
Melbourne Cladding Solutions
Melbourne's weatherboard & cladding specialists

Upgrade the whole wall, not just the boards.

Replace ageing weatherboards or cladding while you have the opportunity to assess and improve what sits behind them, from insulation and wall membrane to flashing, cavity ventilation and window detailing.

From one complete wall or elevation through to multi-wall and whole-home replacement.

  • 13+ years carpentry experience
  • Residential specialists
  • Timber & fibre-cement options
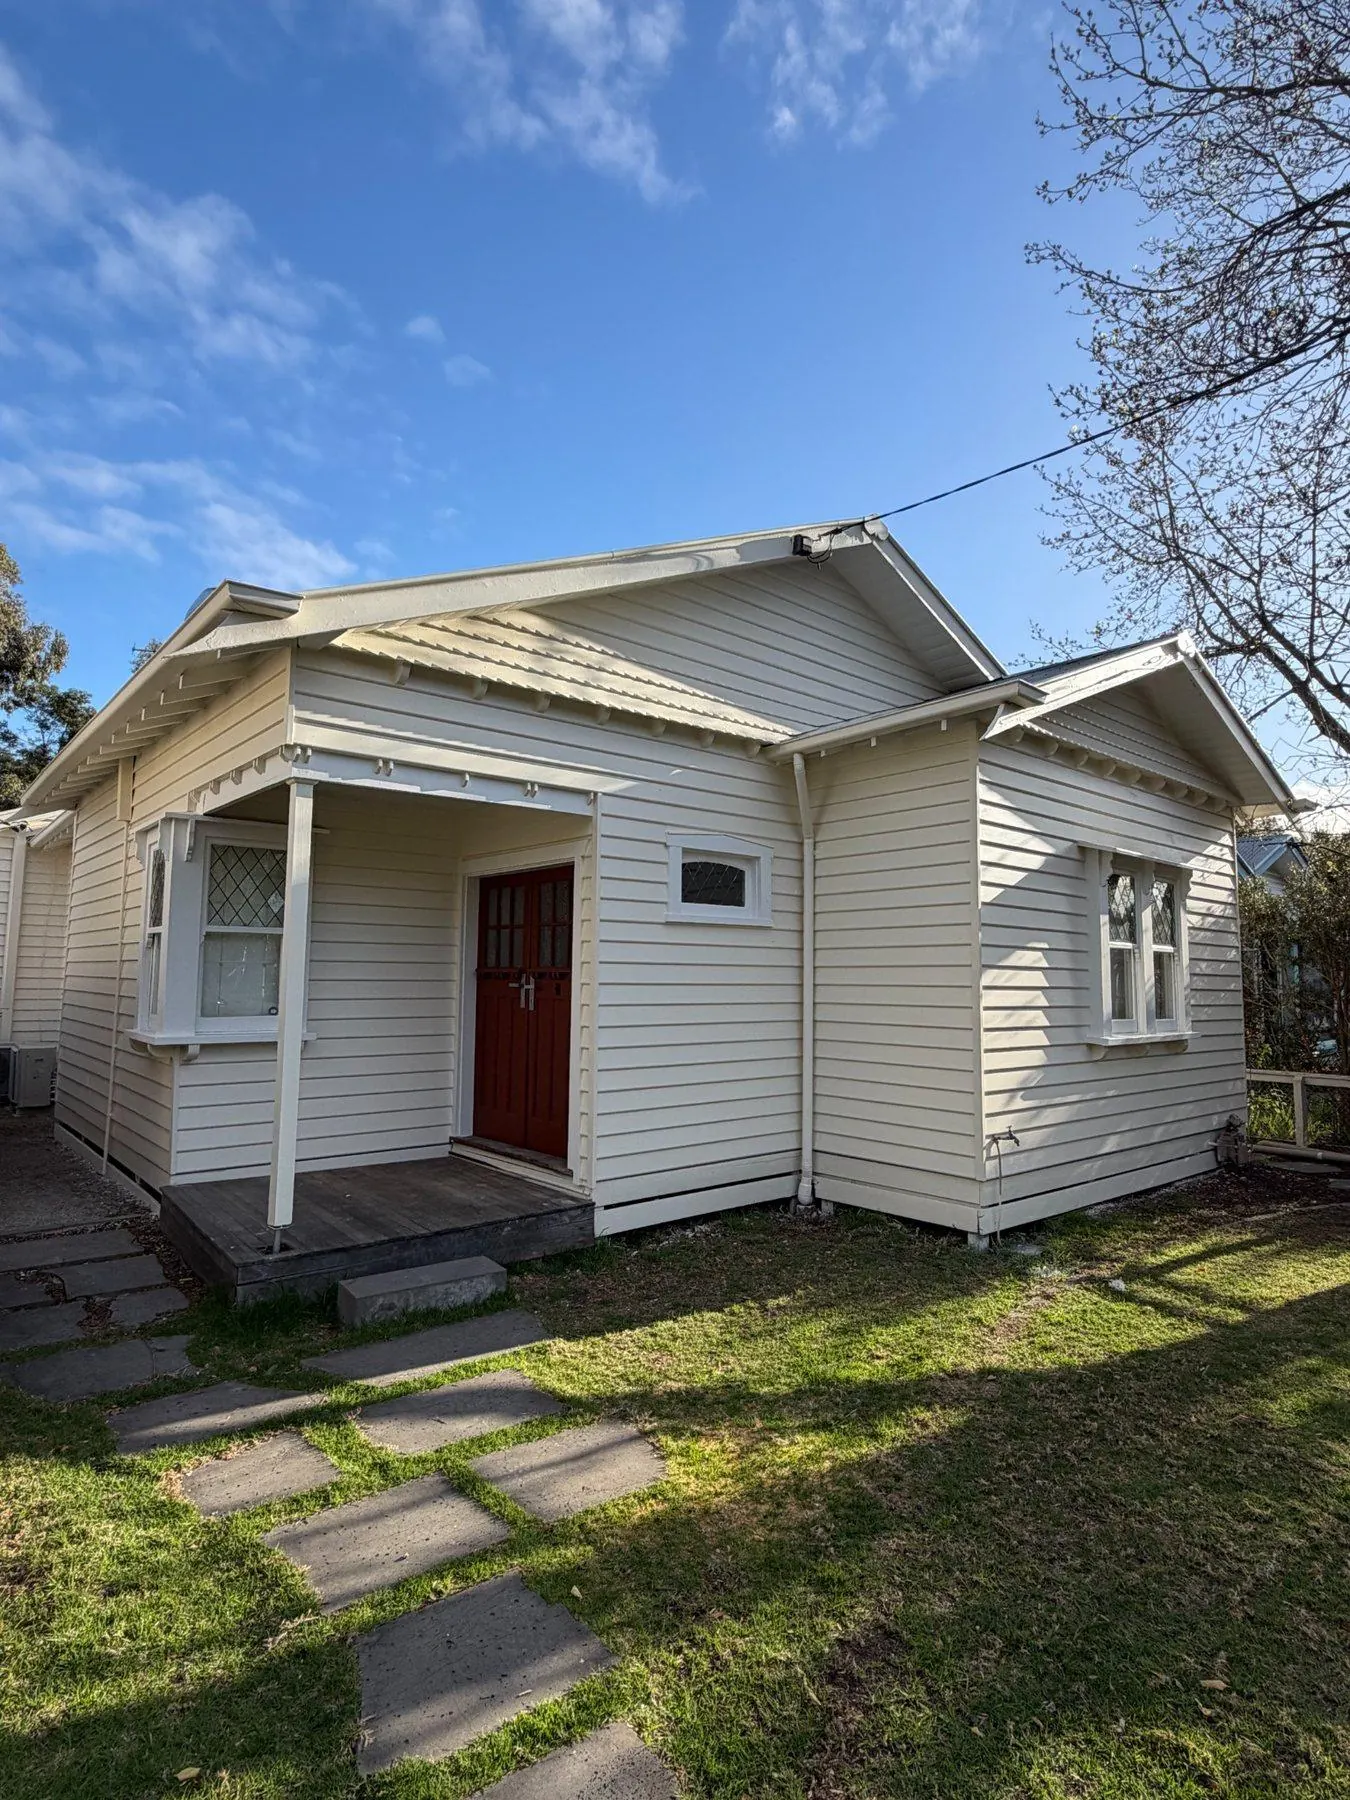
Completed weatherboard replacement on a Northcote home, repainted cream with restored windows

See the transformation

Northcote weatherboard upgrade

Multi-elevation weatherboard replacement and renewal, wall-system upgrades, window restoration and complete exterior repainting.

The visible transformation is only part of the job. This project also gave us access to the wall behind the weatherboards so insulation, moisture management and detailing could be improved before everything was closed up again.

The same Northcote elevation after weatherboard replacement and repainting
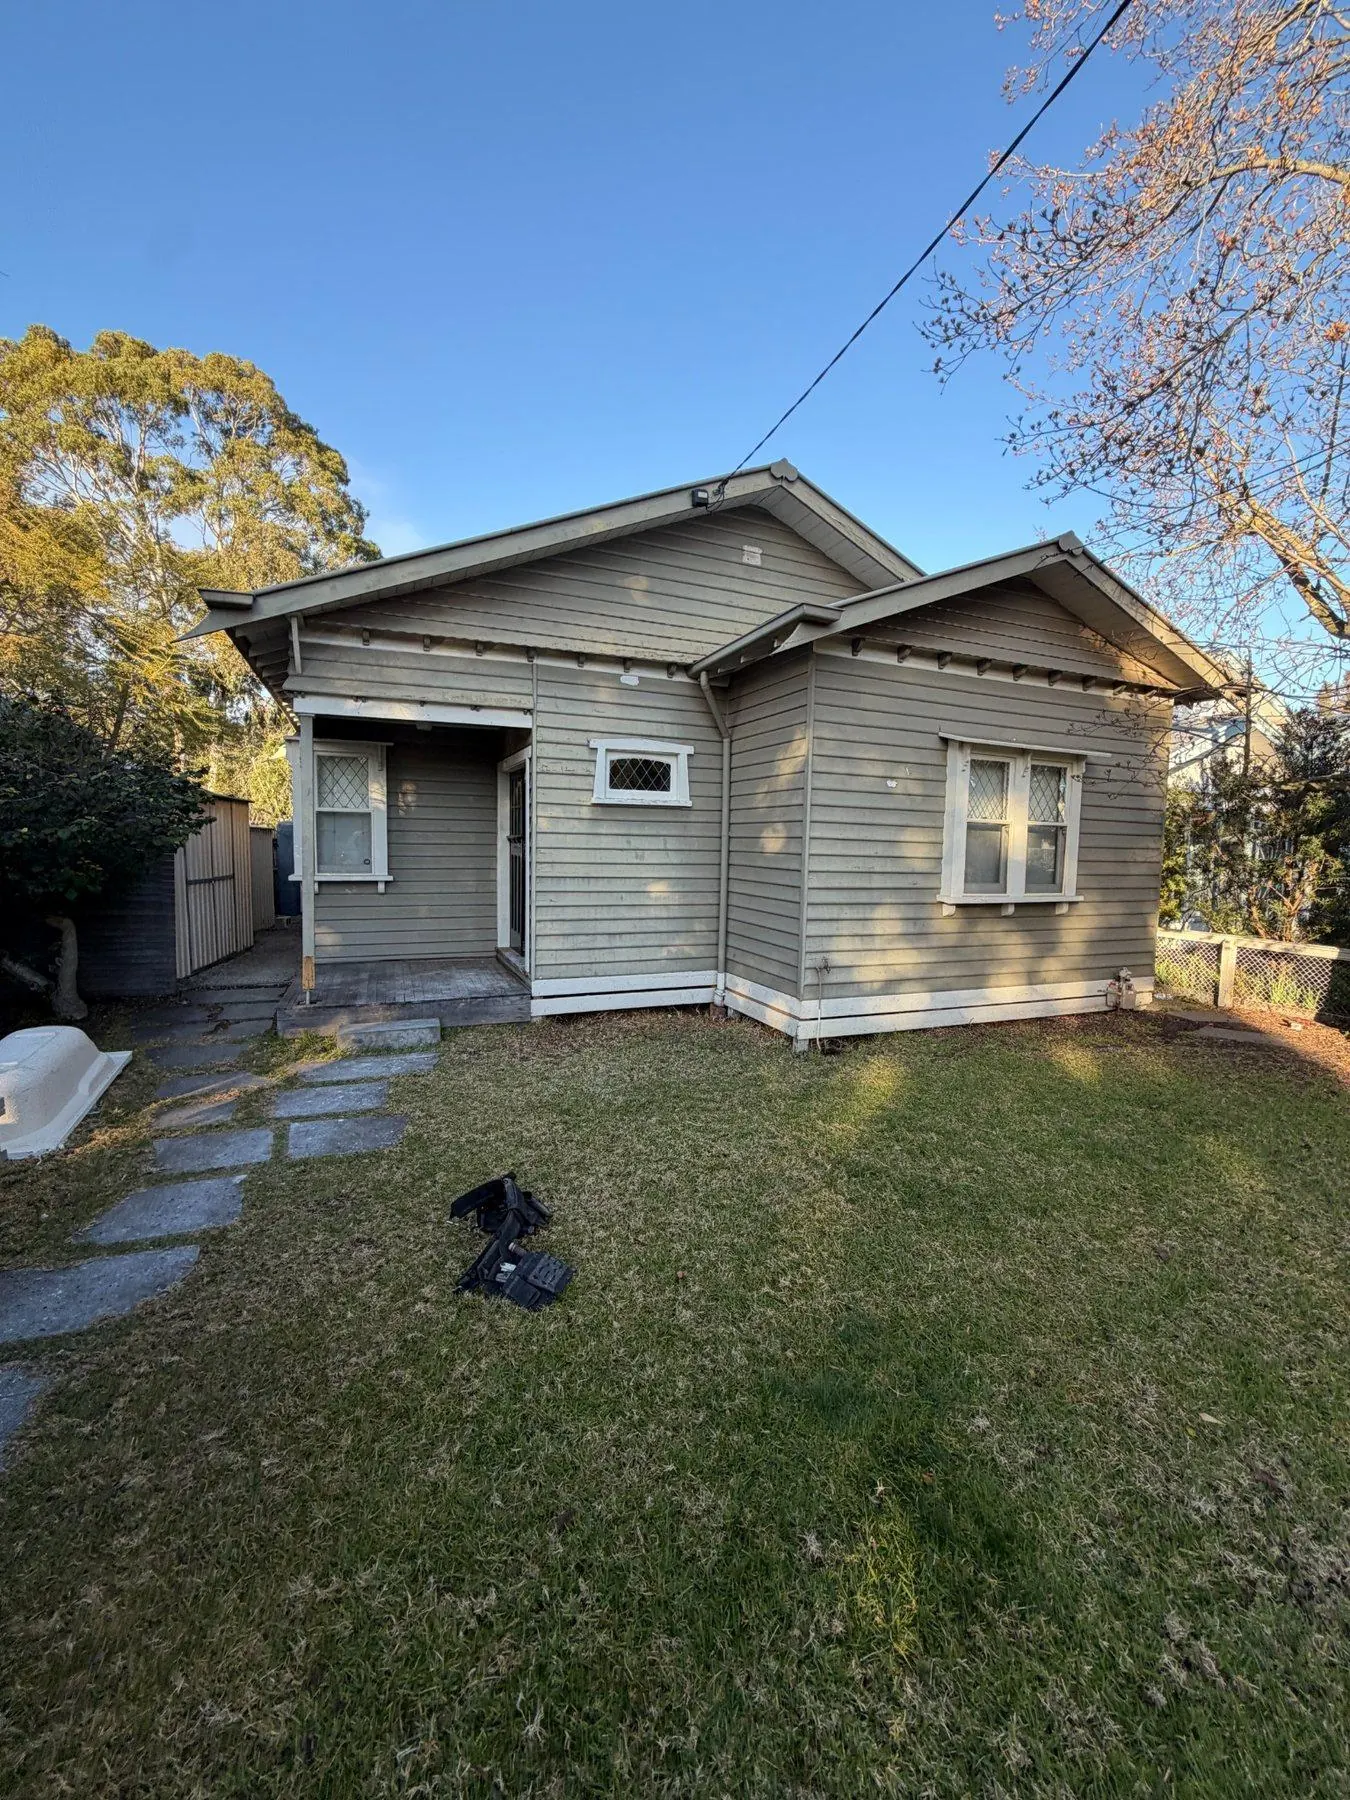
Northcote weatherboard home before replacement, faded grey boards and tired windows
BeforeAfter
Drag to compare

When does weatherboard replacement make sense?

A few damaged boards do not automatically mean an entire wall needs replacing. But replacement may be worth considering when deterioration is spread across an elevation, different sections keep requiring repairs, the cladding has reached the end of its useful life, or you want to improve the wall while it is open.

MCS weatherboard and cladding replacement starts at one complete wall or elevation and can extend to several elevations, an entire level or the whole home.

If the issue is genuinely localised, we also provide Weatherboard & Cladding Repairs rather than recommending more replacement than the property needs.

Only have a few damaged boards? View Weatherboard & Cladding Repairs →

New cladding is only the outside layer.

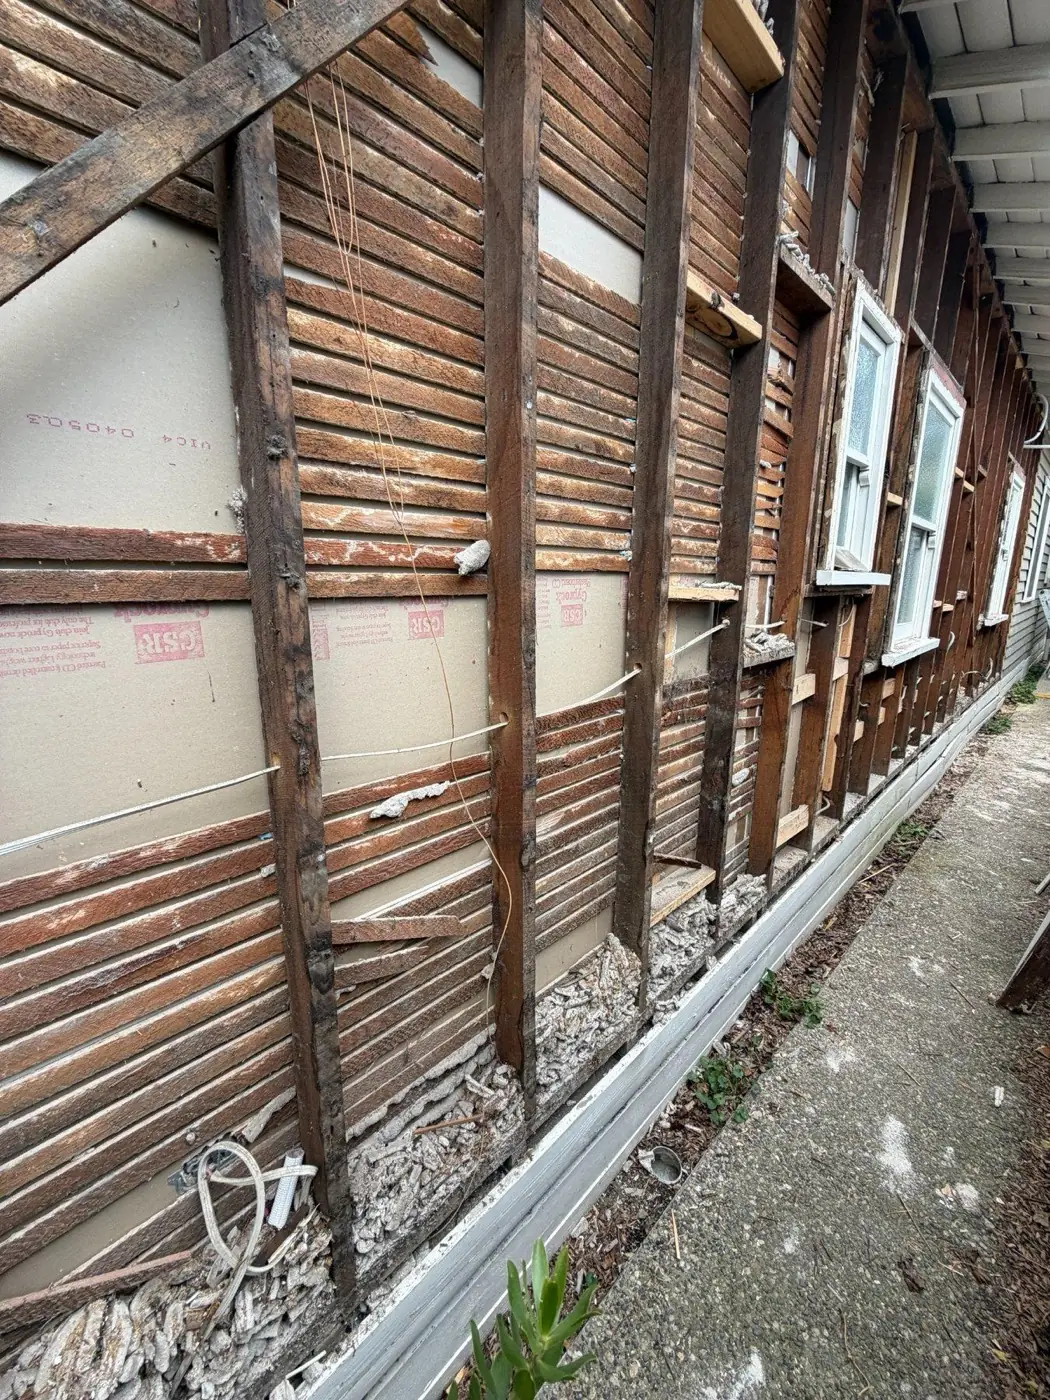
On many older Melbourne homes, removing the cladding is the first time the external wall has been properly visible for decades. That gives us the opportunity to inspect what was hidden and agree the right scope before the wall is closed again.

  1. 01

    Framing condition

    Check the accessible structure for deterioration, debris and issues that were concealed by the existing cladding.

  2. 02

    Wall insulation

    Add or upgrade insulation where appropriate while the wall cavity is accessible.

  3. 03

    Wall membrane

    Install a suitable vapour-permeable wall membrane and detail the junctions and penetrations correctly.

  4. 04

    Window & penetration detailing

    Integrate flashing and membrane around windows, doors and services rather than simply cutting new cladding around them.

  5. 05

    Cavity ventilation

    Where suitable for the selected system, install cavity battens to create separation between the membrane and external cladding.

  6. 06

    New cladding & finish

    Install the selected weatherboard or cladding system, complete trims and coordinate painting where included.

This is what we mean by upgrading the whole wall.

Existing wall opened and assessed.
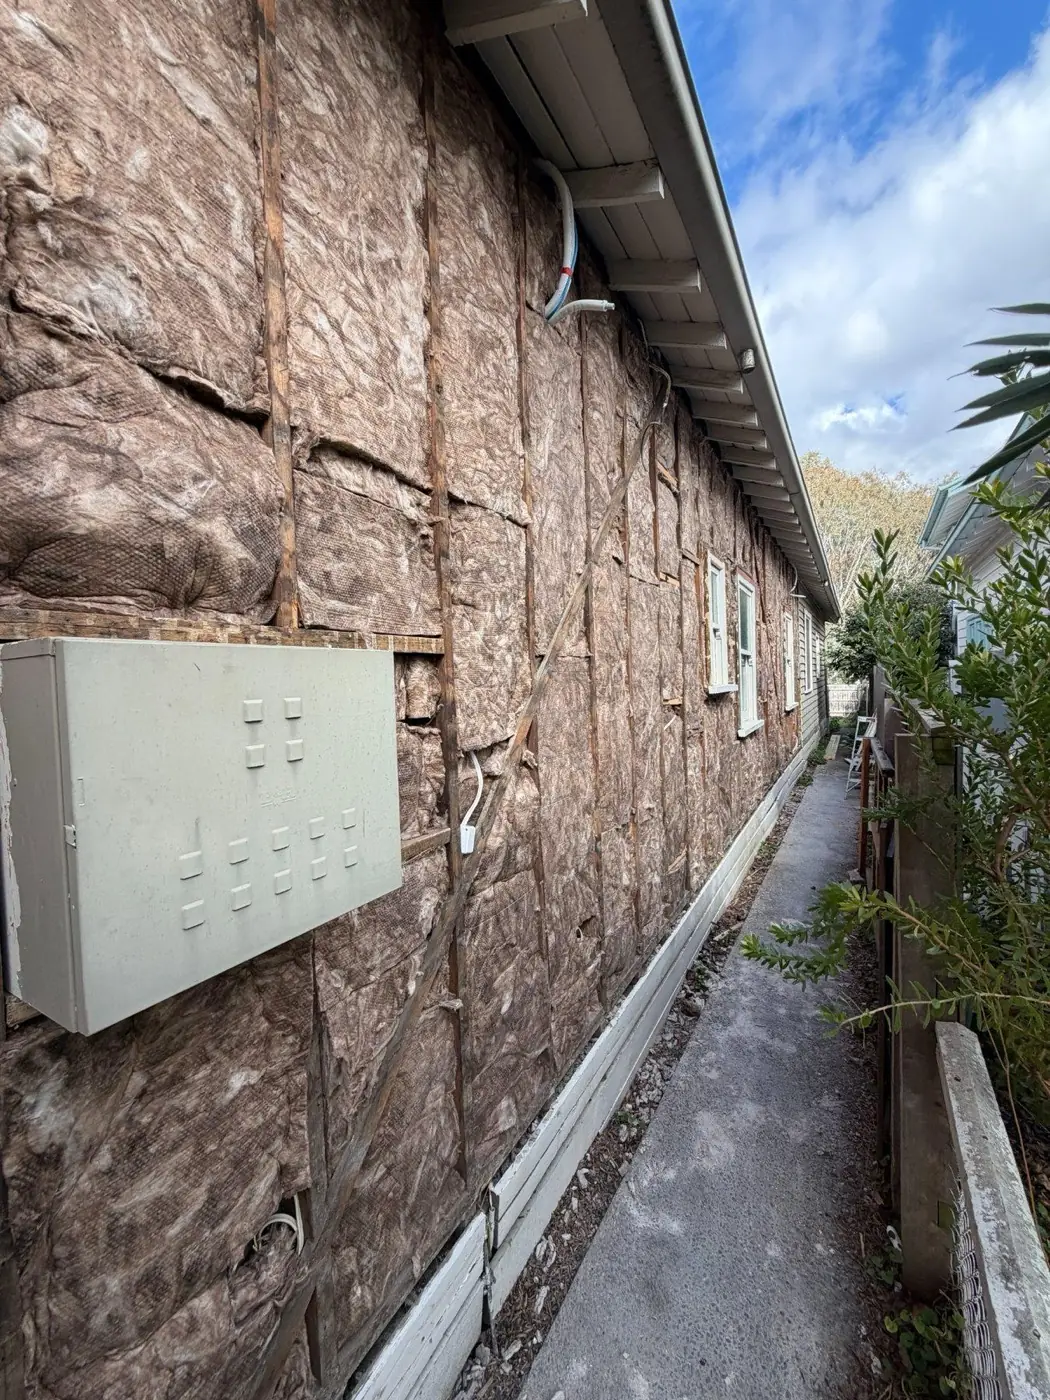
Wall insulation installed.

What could your replacement project cost?

Get an indicative price range before arranging a site visit.

Your estimate will take into account the size and condition of the project, access, selected wall system and finishing requirements.

  1. 01Project information
  2. 02Indicative range displayed
  3. 03Customer details and optional photos
  4. 04MCS qualification
  5. 05Site visit for qualified leads
  6. 06Fixed quotation after measure and assessment

Step 1 of 9

Who we are pricing for

Two questions, and nothing here identifies you.

Who is the project for?
How much of the exterior are we talking about?

You will see your range on step 8, before we ask for any contact details.

Northcote weatherboard replacement, restoration and wall-system upgrade

The home had no wall insulation, no dedicated condensation-management layer, and an exterior finish that had become dull and was beginning to flake.

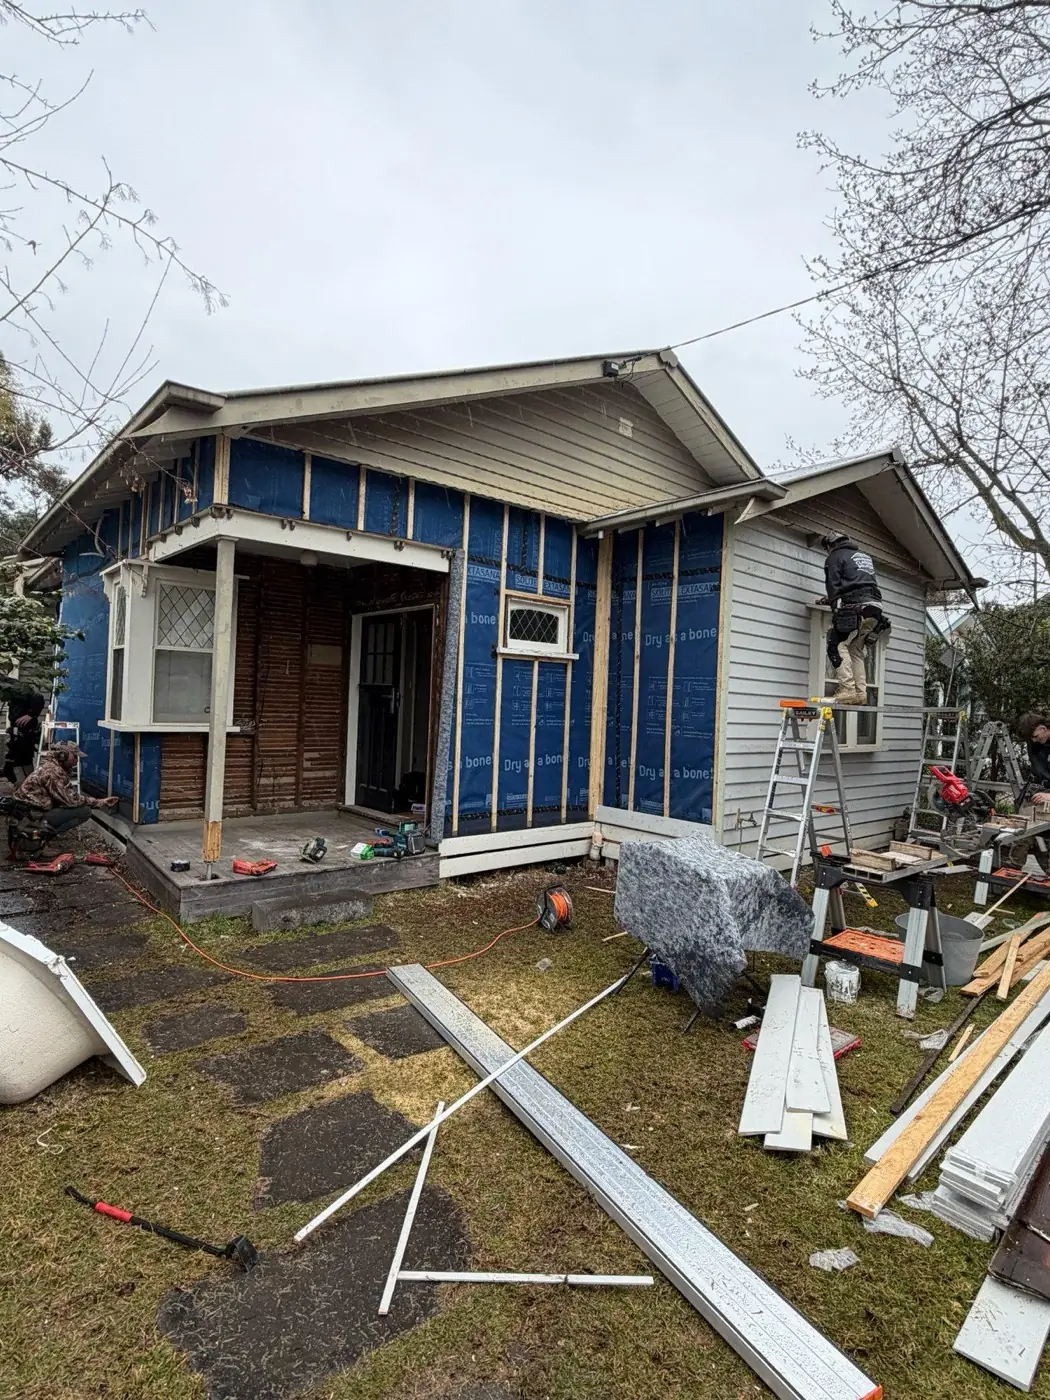
MCS opened multiple elevations so the wall could be assessed and upgraded before the exterior went back together.

What we completed

  • Fully replaced the timber weatherboards to the front elevation.
  • Carefully removed and reinstated suitable original weatherboards to the side elevation.
  • Assessed the exposed framing and cleared debris from the wall cavities.
  • Installed R2.7 wall insulation.
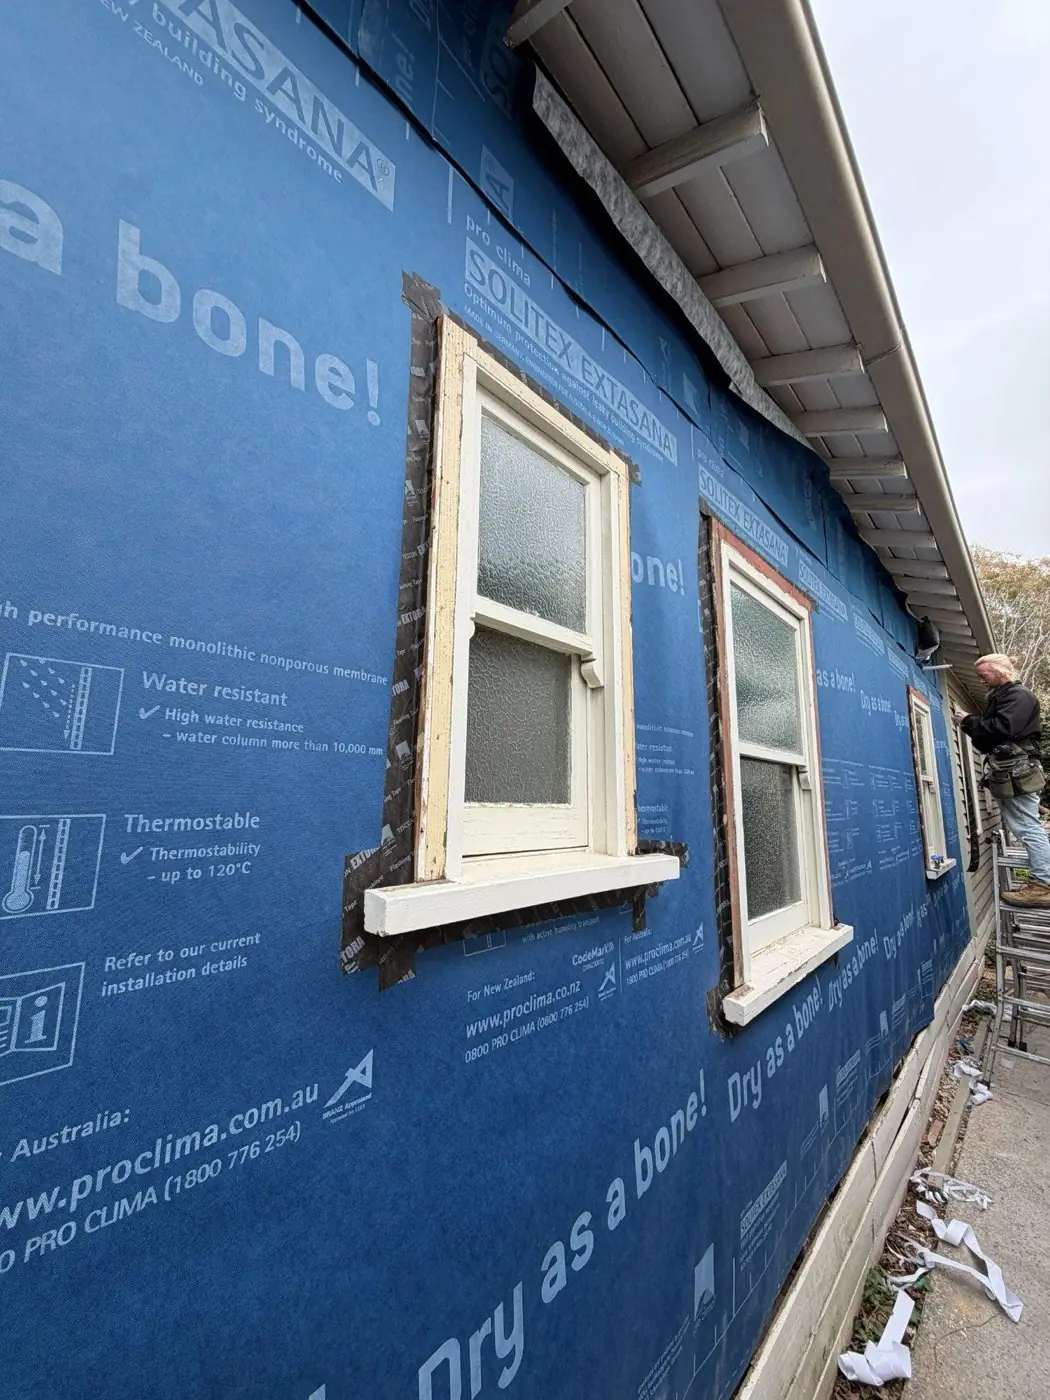
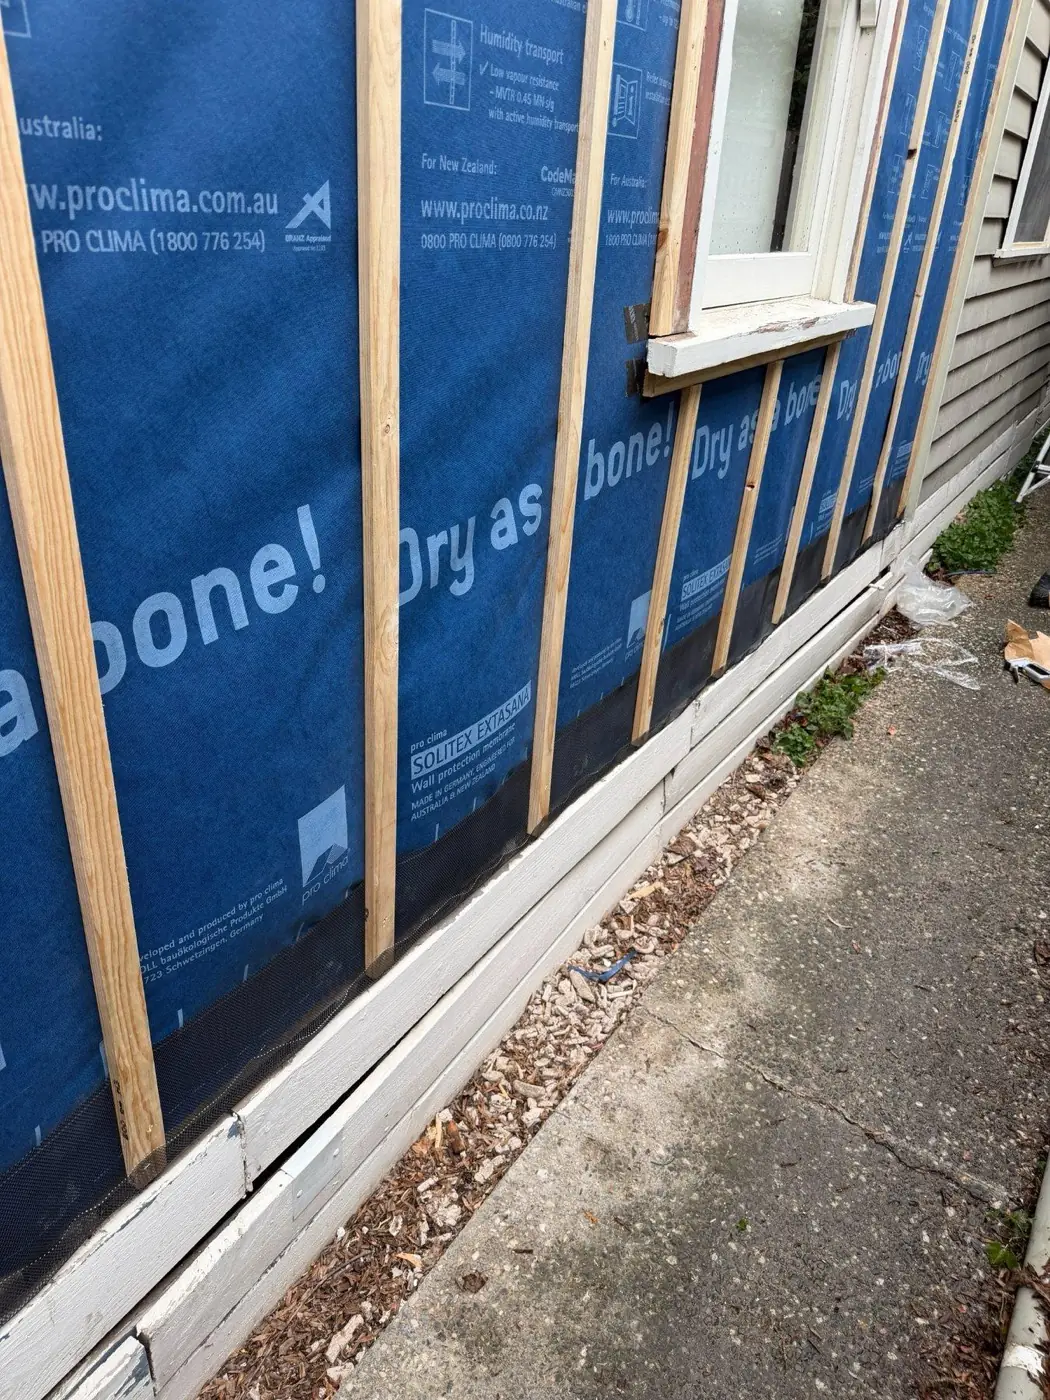
  • Installed Pro Clima vapour-permeable wall membrane.
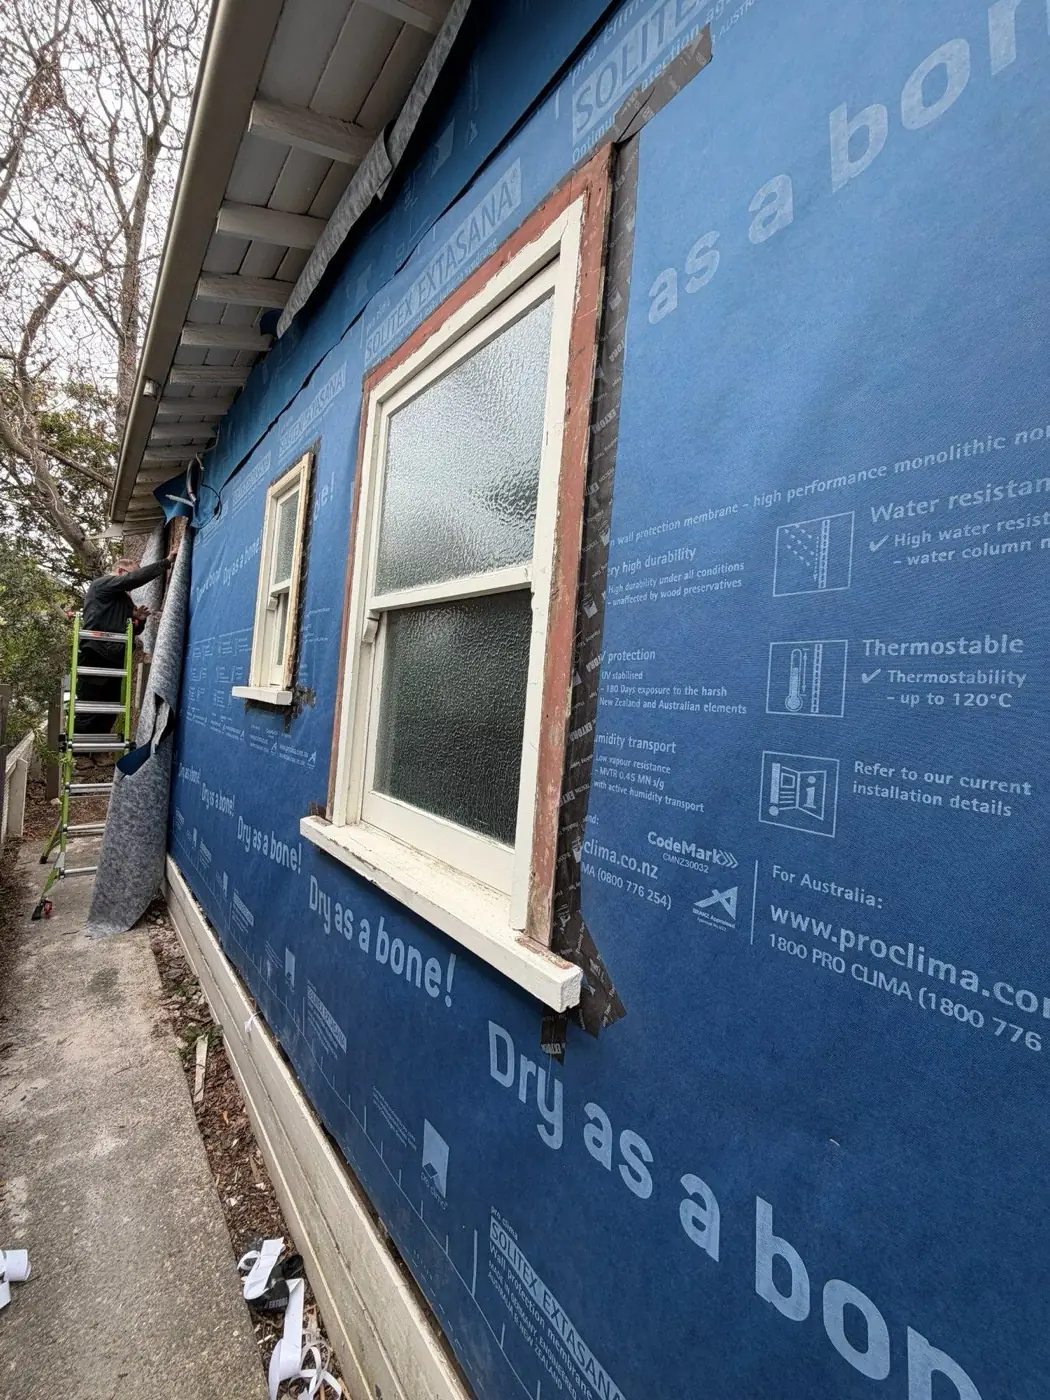
  • Detailed penetrations and the full perimeter of window openings.
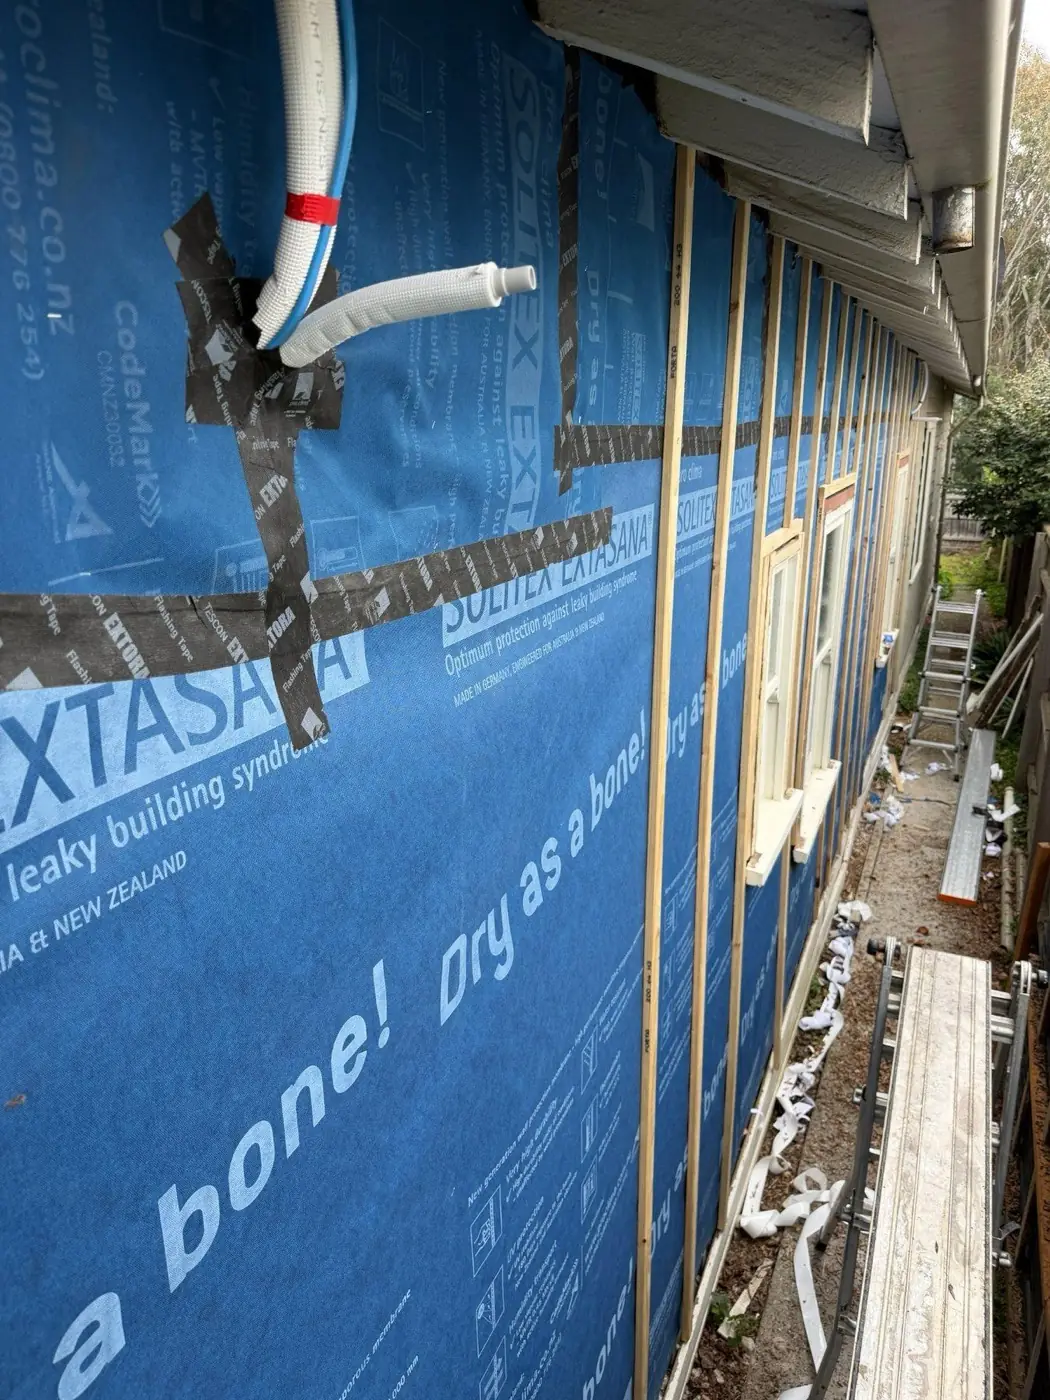
  • Installed cavity battens.
  • Restored existing windows and installed scribers where required.
  • Completed full exterior paint preparation and repainting.

Delivered duration: approximately 2 weeks.

This project shows scope discipline: replace where replacement is justified, retain and reinstall suitable original material where it remains serviceable, and upgrade the wall while access is available.

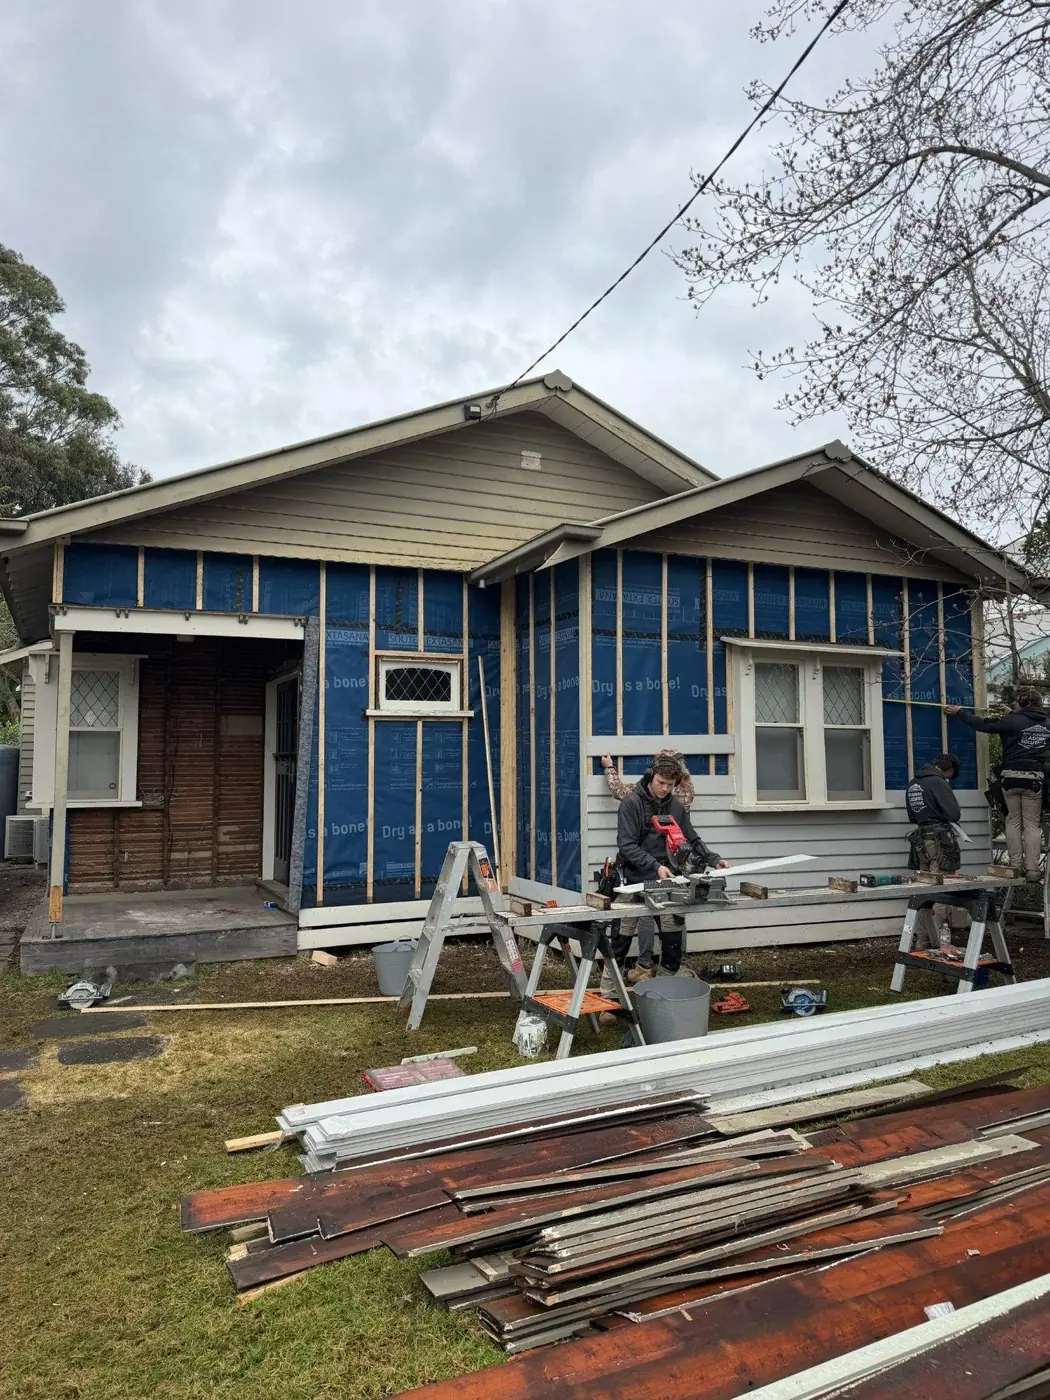
Northcote weatherboard replacement: northcote project in progress.
Northcote project in progress.
Northcote weatherboard replacement: weatherboard installation underway.
Weatherboard installation underway.

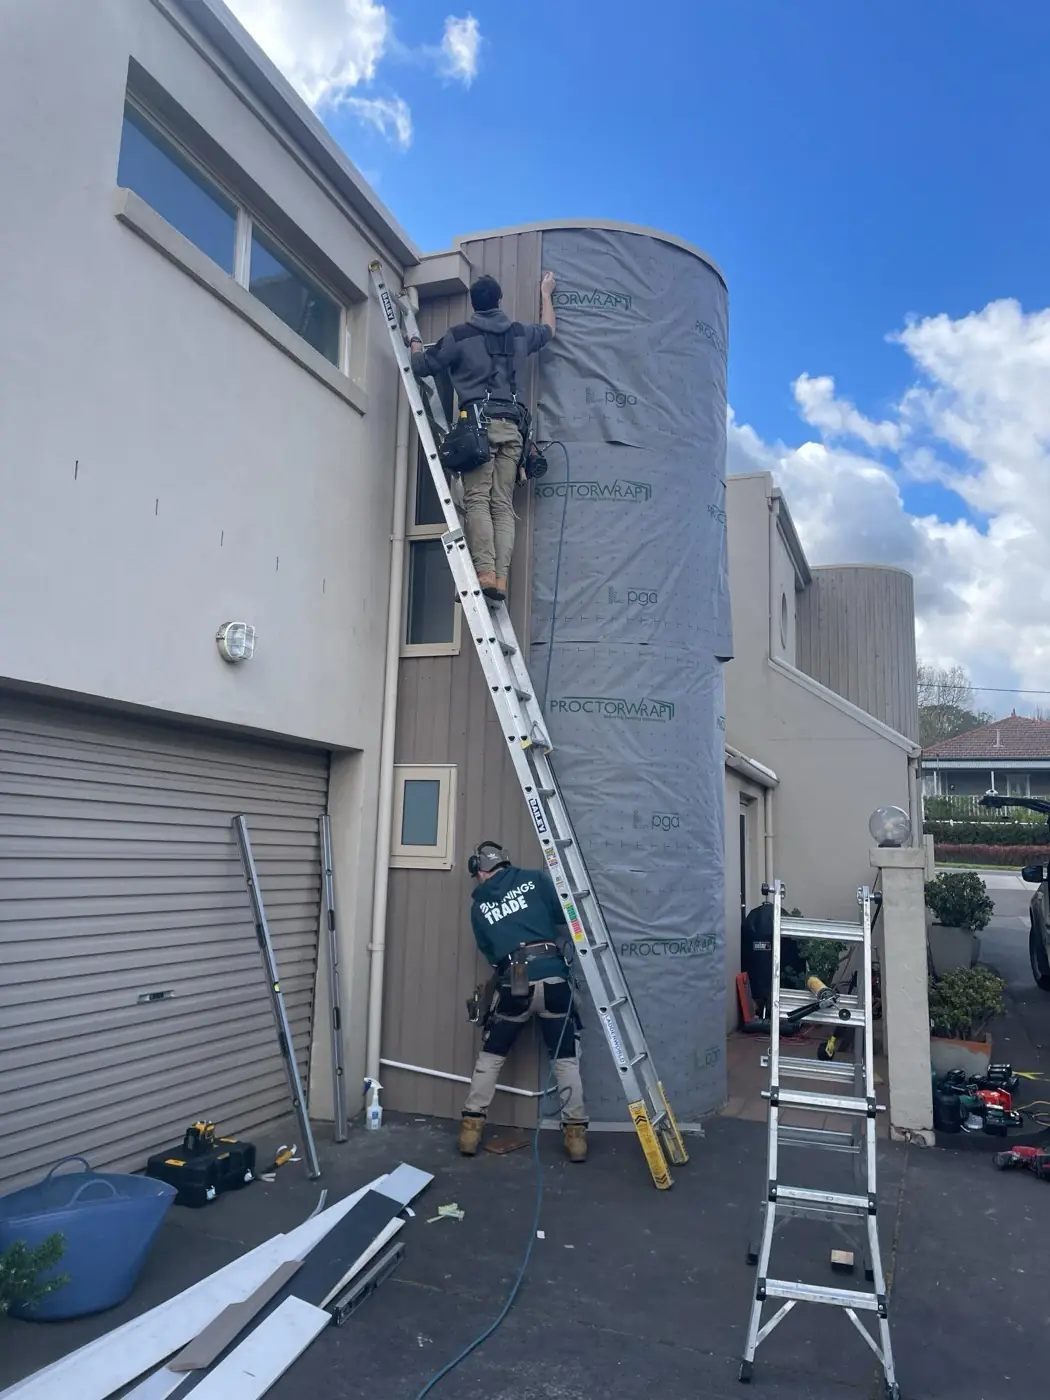
The work you won't see once the boards go back on

The finished cladding matters, but so does the work that disappears behind it. We photograph key stages so important concealed details can be documented before the wall is closed.

  • Pro Clima membrane installed and integrated around existing window openings.

    Pro Clima membrane installed and integrated around existing window openings.

  • Window perimeter detailing before the new cladding is installed.

    Window perimeter detailing before the new cladding is installed.

  • Penetration detailing through the wall membrane.

    Penetration detailing through the wall membrane.

  • Cavity battens installed over the membrane before recladding.

    Cavity battens installed over the membrane before recladding.

What Robert said

“Leon and team did an amazing job on our weatherboard recladding project in Northcote. They were professional, communicated clearly, and did the extra things that build confidence in the final result. I would highly recommend them to anyone looking to insulate and repair or replace weatherboards.”

Robert Marsh · Northcote

Glen Iris

Fibre-cement weatherboard replacement

  • Existing timber weatherboards removed and disposed of.
  • Wall wrap / vapour barrier upgraded before recladding.
  • Innova Nuline Round Edge fibre-cement weatherboards installed.
  • Double-storey access managed by MCS.
  • Painting coordinated to complete the finished exterior.

The homeowner had lived in the property for more than 20 years and was tired of recurring rot to the timber weatherboards on a 1990s double-storey extension. Sections had been patched only around five years earlier, but deterioration was already returning. Ongoing access and maintenance at height had also become something he no longer wanted to manage.

MCS removed the timber weatherboards from the extension, upgraded the wall wrap, and installed Innova Nuline Round Edge fibre-cement weatherboards. Our painters followed later that week, with the replacement and finishing completed in under two weeks.

“Leon and his team did a great job with replacing my weatherboards. The quality of the workmanship was outstanding, the price was good and they finished everything in a timely manner. I would recommend them.”
Richard Abrahams

A practical lower-maintenance replacement for a homeowner who no longer wanted recurring timber repairs and high-level repainting.
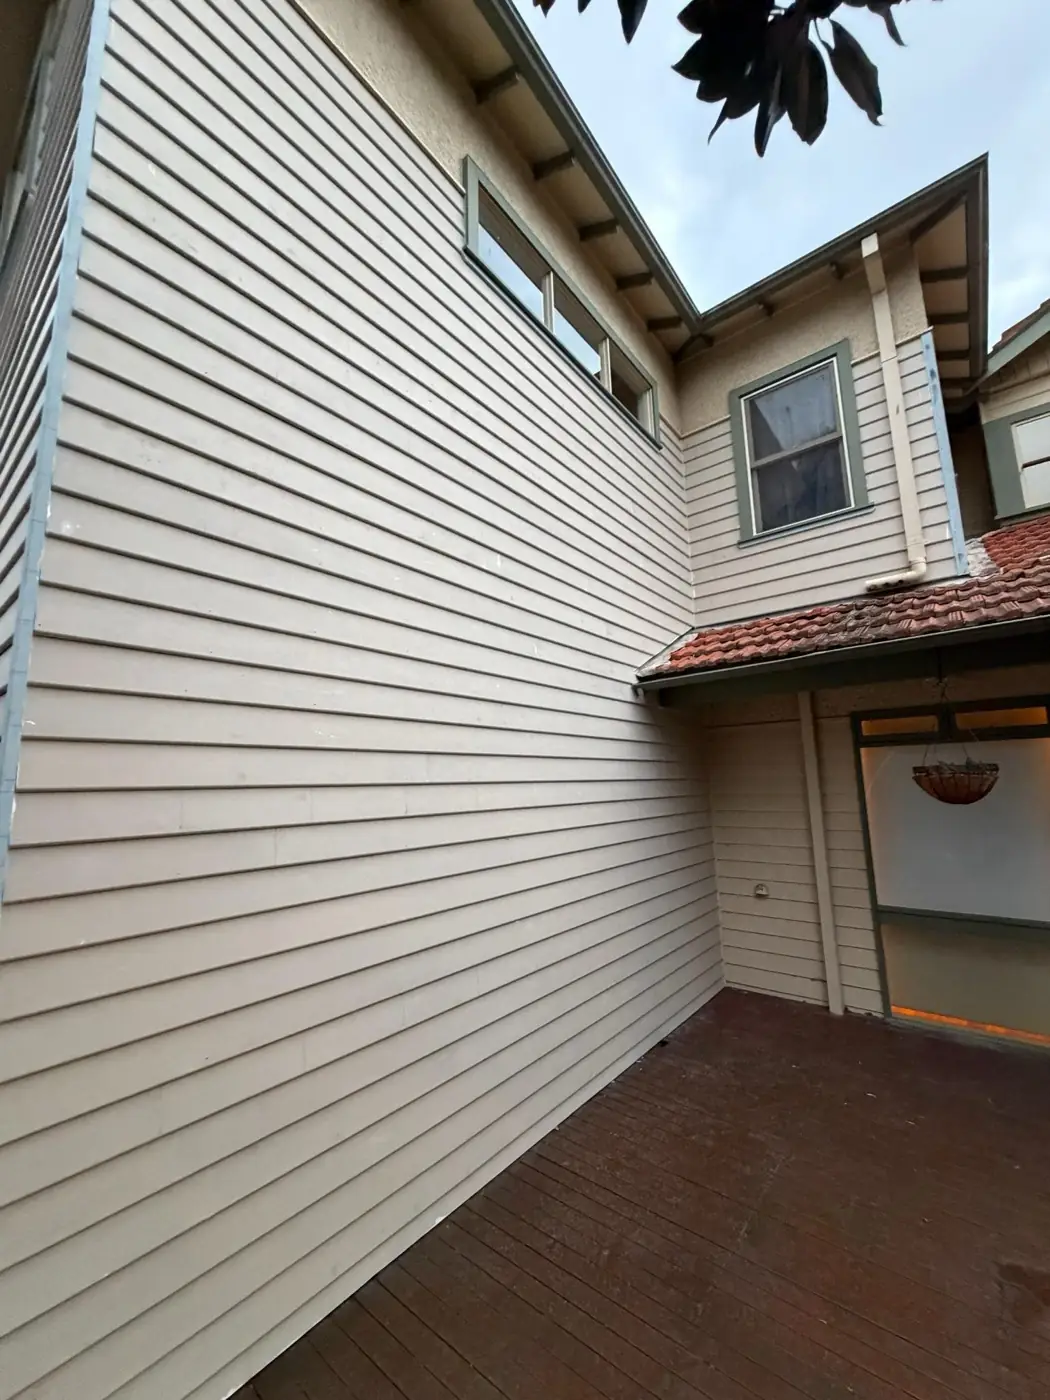
  • Glen Iris · Existing timber weatherboards showing the area to be replaced.
    Glen Iris · Existing timber weatherboards showing the area to be replaced.

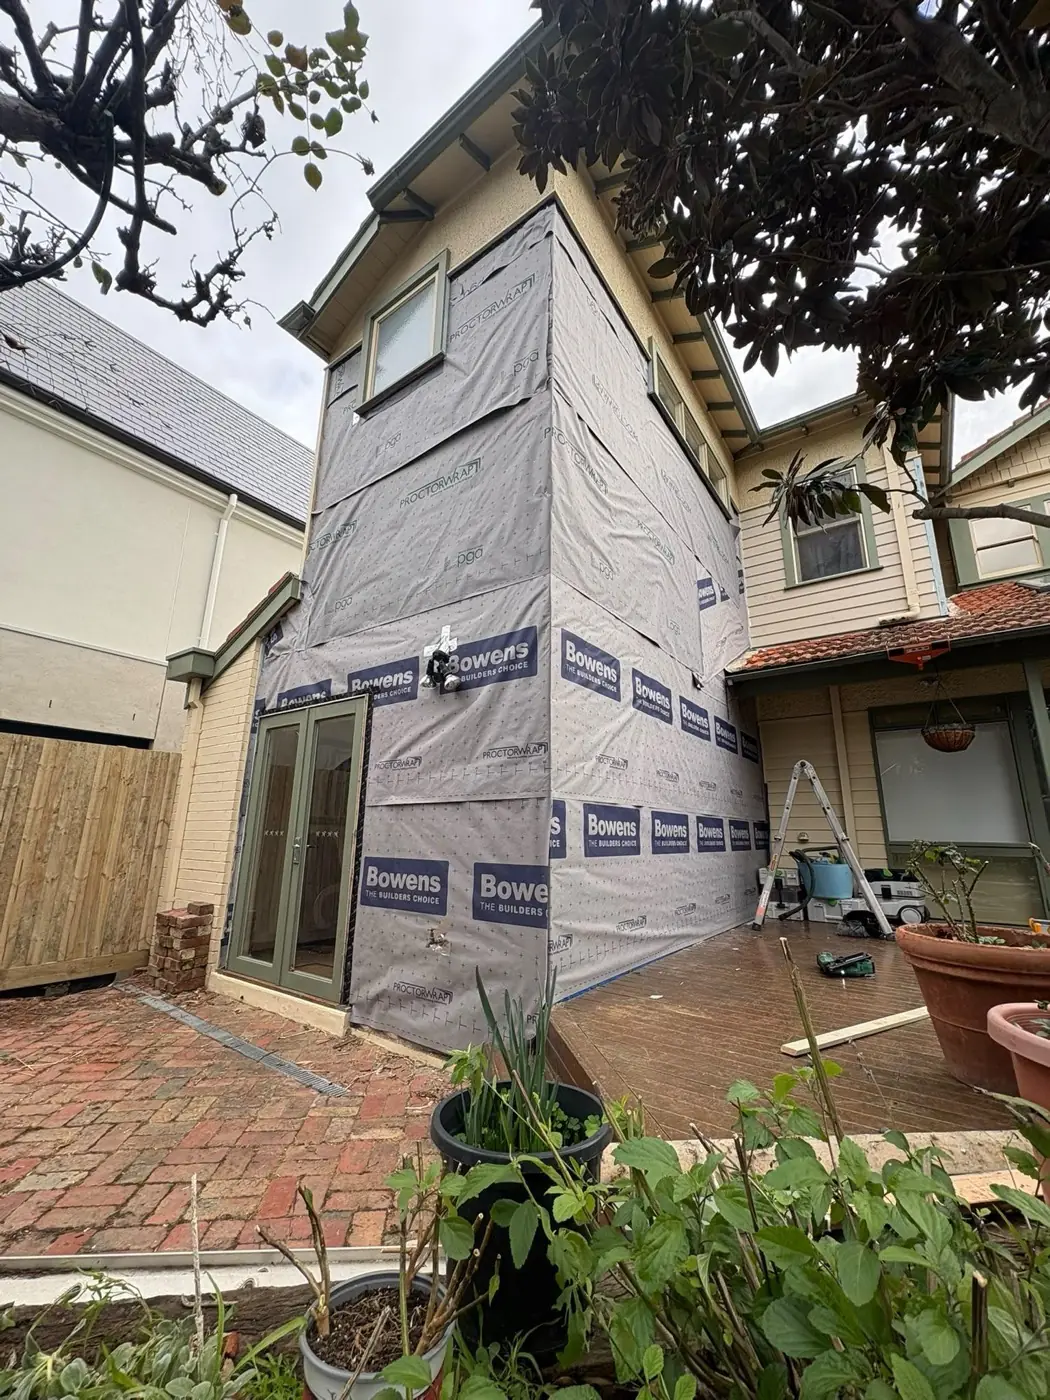
  • Glen Iris · Wall wrapped and ready for fibre-cement recladding.
    Glen Iris · Wall wrapped and ready for fibre-cement recladding.

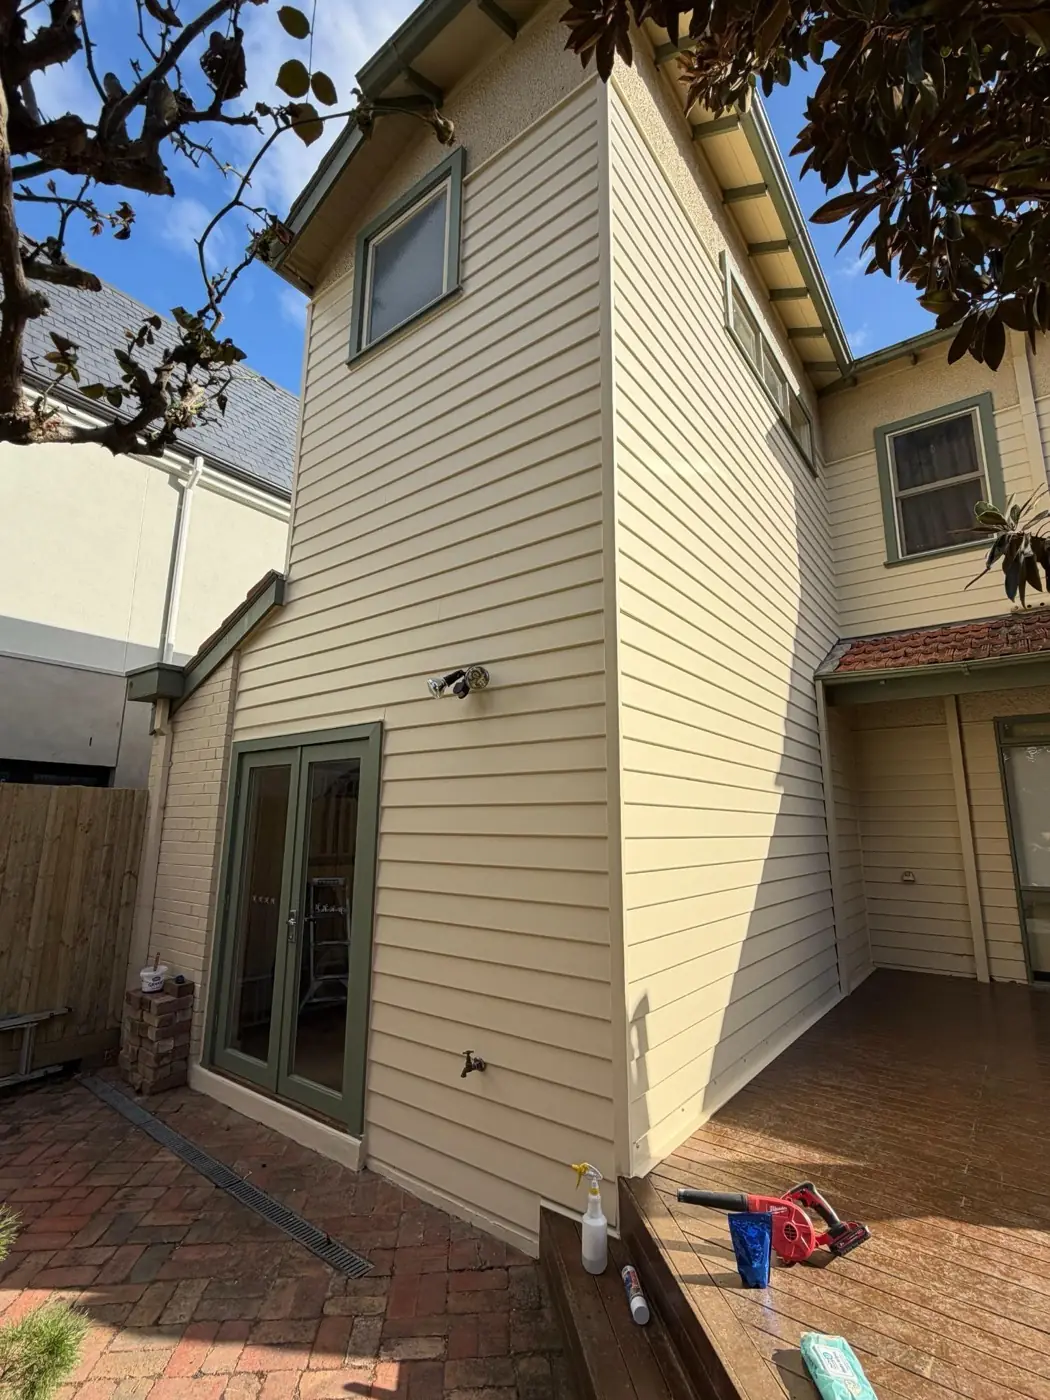
  • Glen Iris · Completed Innova Nuline Round Edge fibre-cement weatherboards.
    Glen Iris · Completed Innova Nuline Round Edge fibre-cement weatherboards.
Coburg

Vinyl weatherboard replacement before sale

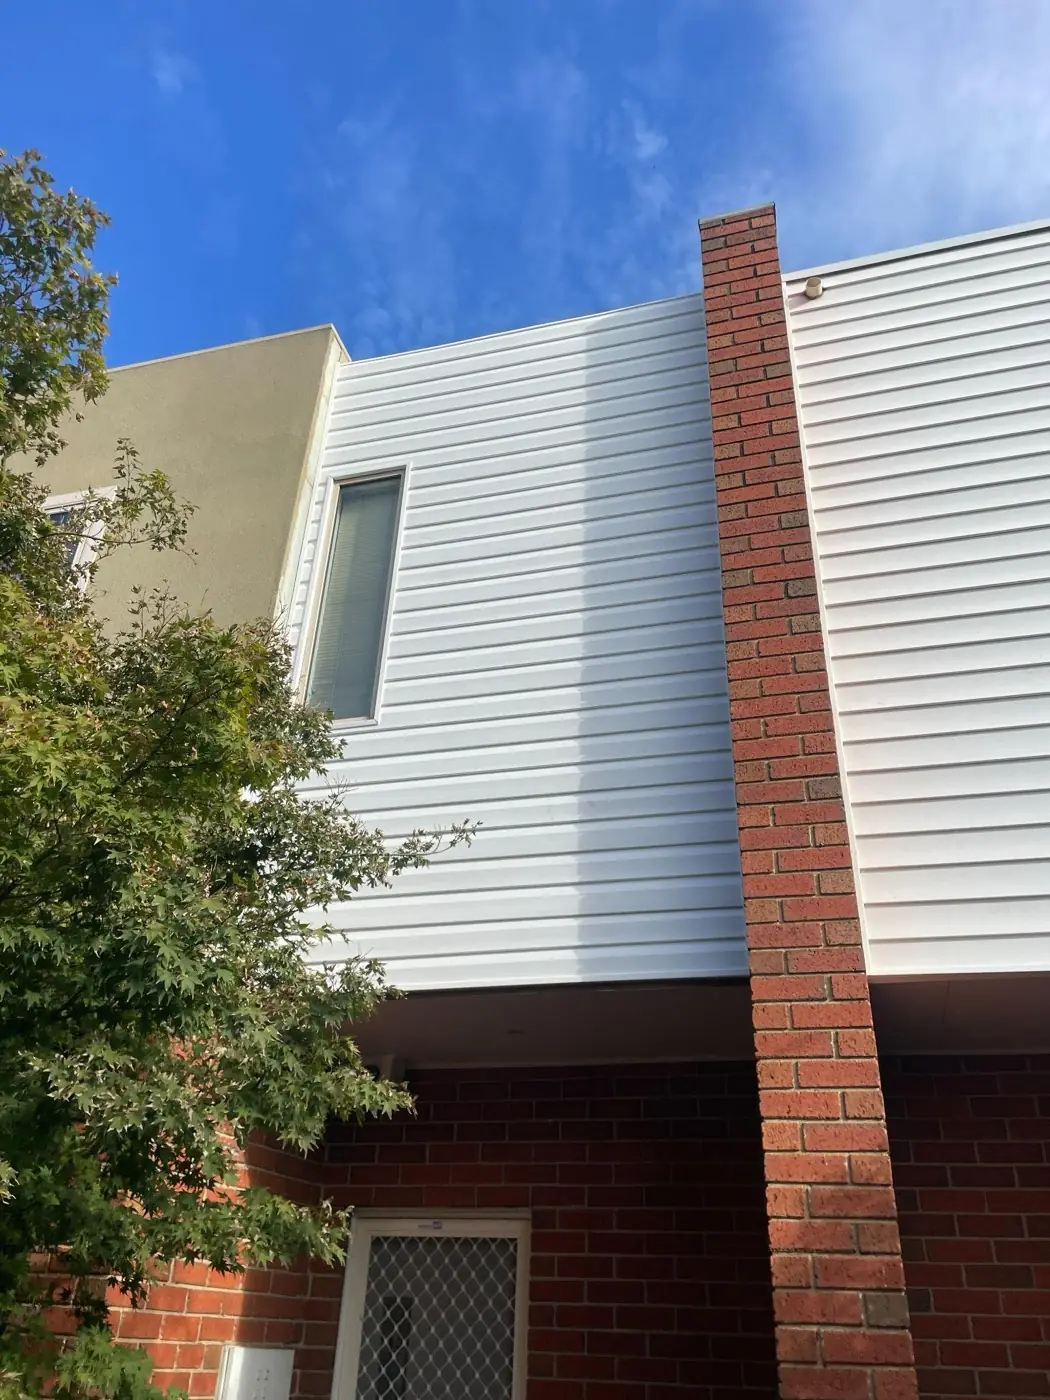
  • Front façade weatherboards removed and disposed of.
  • Window flashing addressed before the new cladding went on.
  • Austech vinyl weatherboards installed.
  • Scaffolding / access coordinated by MCS.
  • No exterior painting required to the new vinyl weatherboards.

The owner was preparing the townhouse for sale. The front façade had timber weatherboards affected by rot and water ingress, and he wanted a tidy, affordable finish without adding the cost or delay of repainting.

A neighbouring townhouse already had vinyl weatherboards, so MCS suggested a matching low-maintenance direction. We supplied the access equipment, removed and disposed of the existing weatherboards, detailed the window flashing and installed Austech vinyl weatherboards, all in one day. The property was ready for the real-estate photography later that week.

Not every replacement needs the same specification. Here the priority was a presentable, low-maintenance exterior delivered quickly before sale.

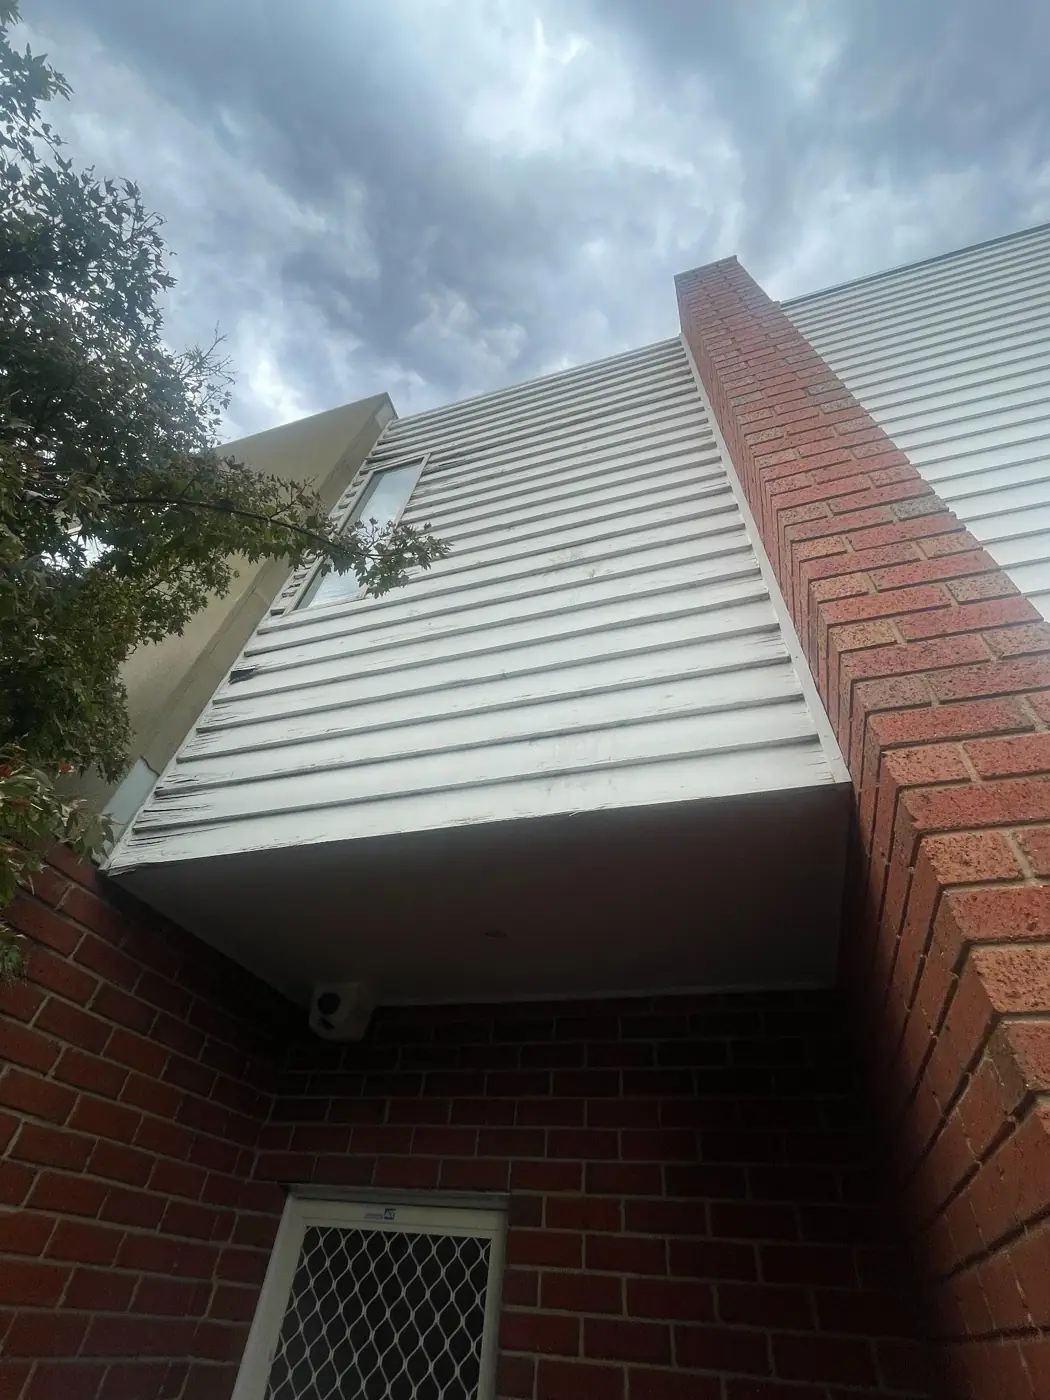
  • Coburg · Deteriorated timber weatherboards before replacement.

    Coburg · Deteriorated timber weatherboards before replacement.

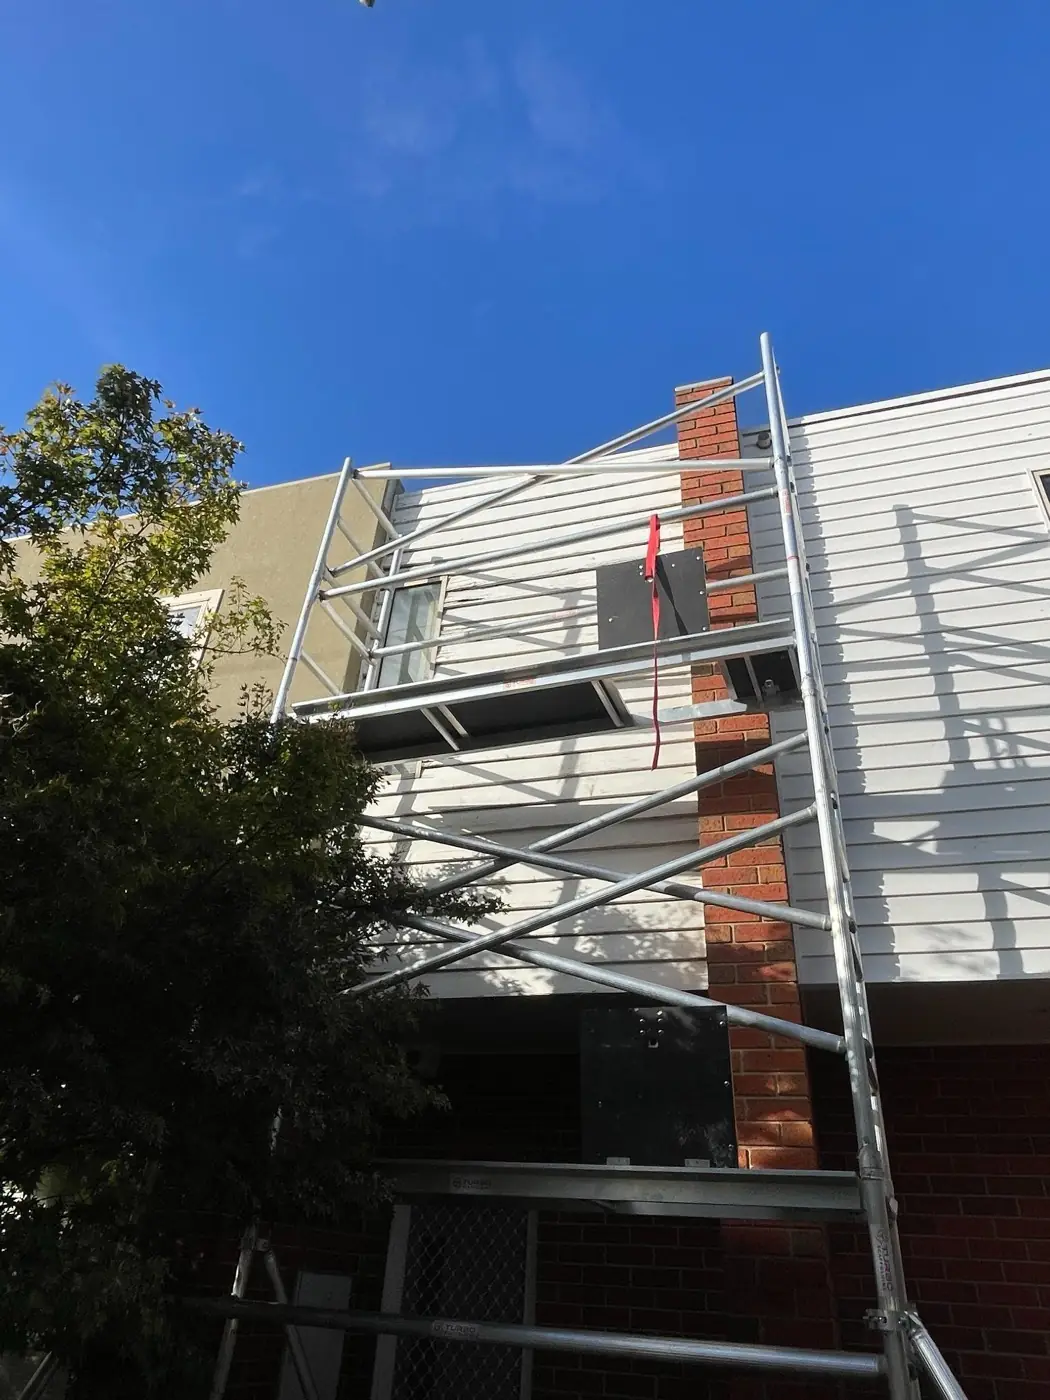
  • Coburg · Access set up during the one-day replacement.

    Coburg · Access set up during the one-day replacement.

  • Coburg · Completed Austech vinyl weatherboard façade.

    Coburg · Completed Austech vinyl weatherboard façade.

End of case studies

Different homes call for different cladding.

MCS installs more than one type of weatherboard. We help homeowners compare appearance, maintenance, detailing and the wall system behind the cladding so the selected product suits the home and the reason for the replacement.

Timber weatherboards

For homeowners who want traditional character, profile matching and the natural appearance of timber. Timber remains a strong fit for heritage-style homes and projects where retaining the original look matters.

Fibre-cement weatherboards & cladding

A practical option where reduced timber maintenance is a priority. MCS installs fibre-cement weatherboard and sheet/profile systems from established manufacturers, with product-specific detailing and finishing.

Real MCS example: Innova Nuline Round Edge in Glen Iris.

Vinyl weatherboards

A pre-finished, low-maintenance option that does not require the same repainting cycle as painted timber. Vinyl can suit selected replacement projects where budget, speed and ongoing maintenance are key priorities.

Real MCS example: Austech vinyl weatherboards in Coburg.

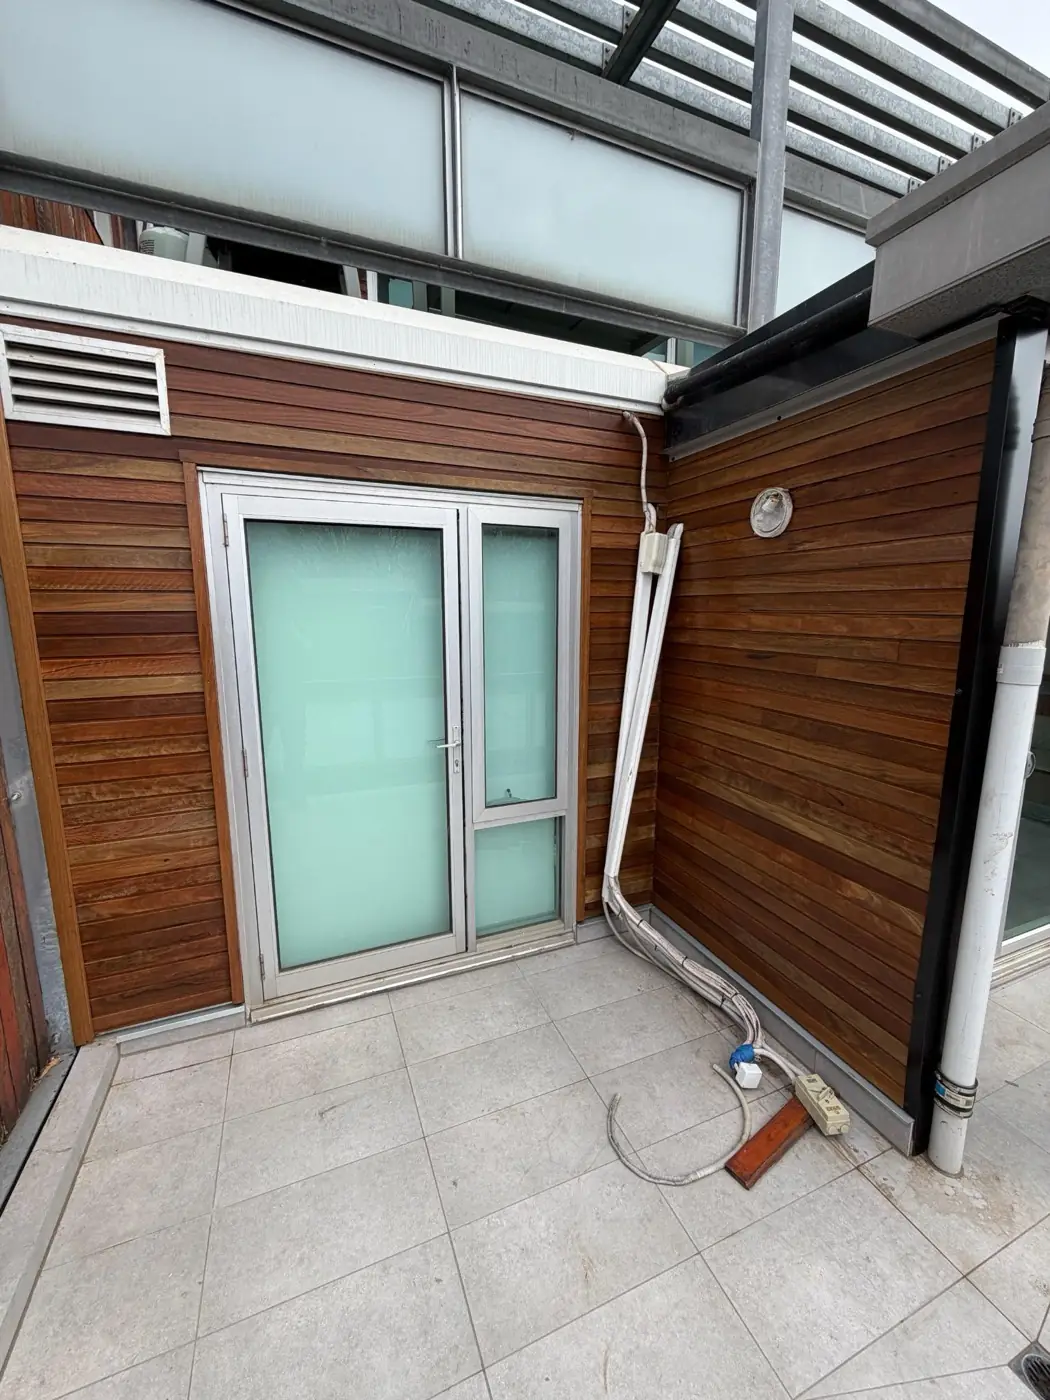
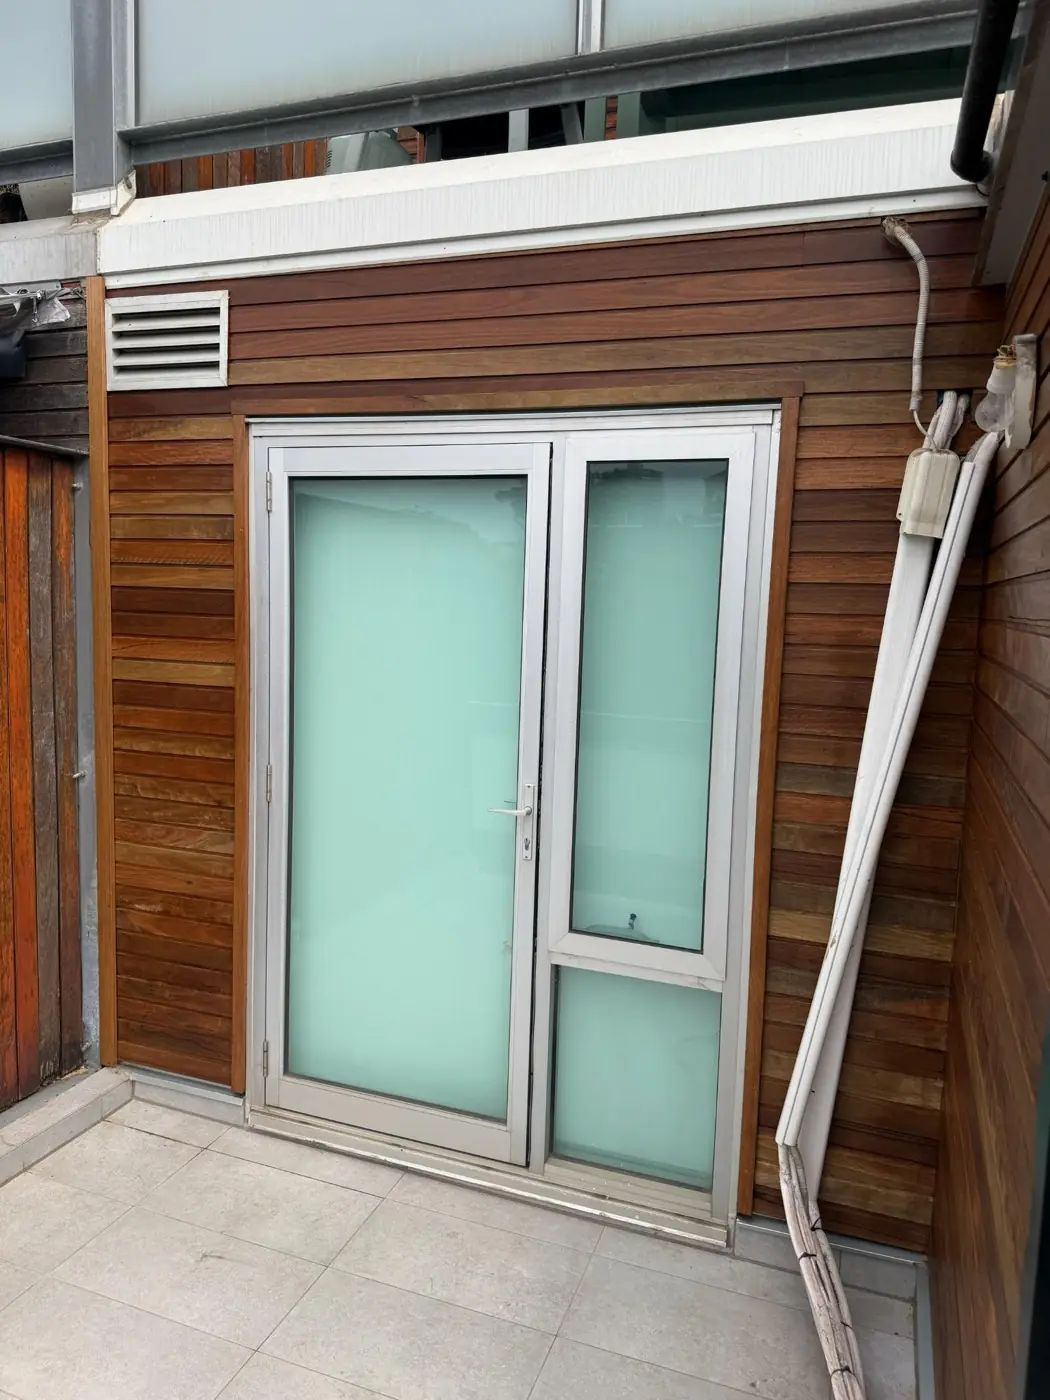
Shiplap & feature cladding

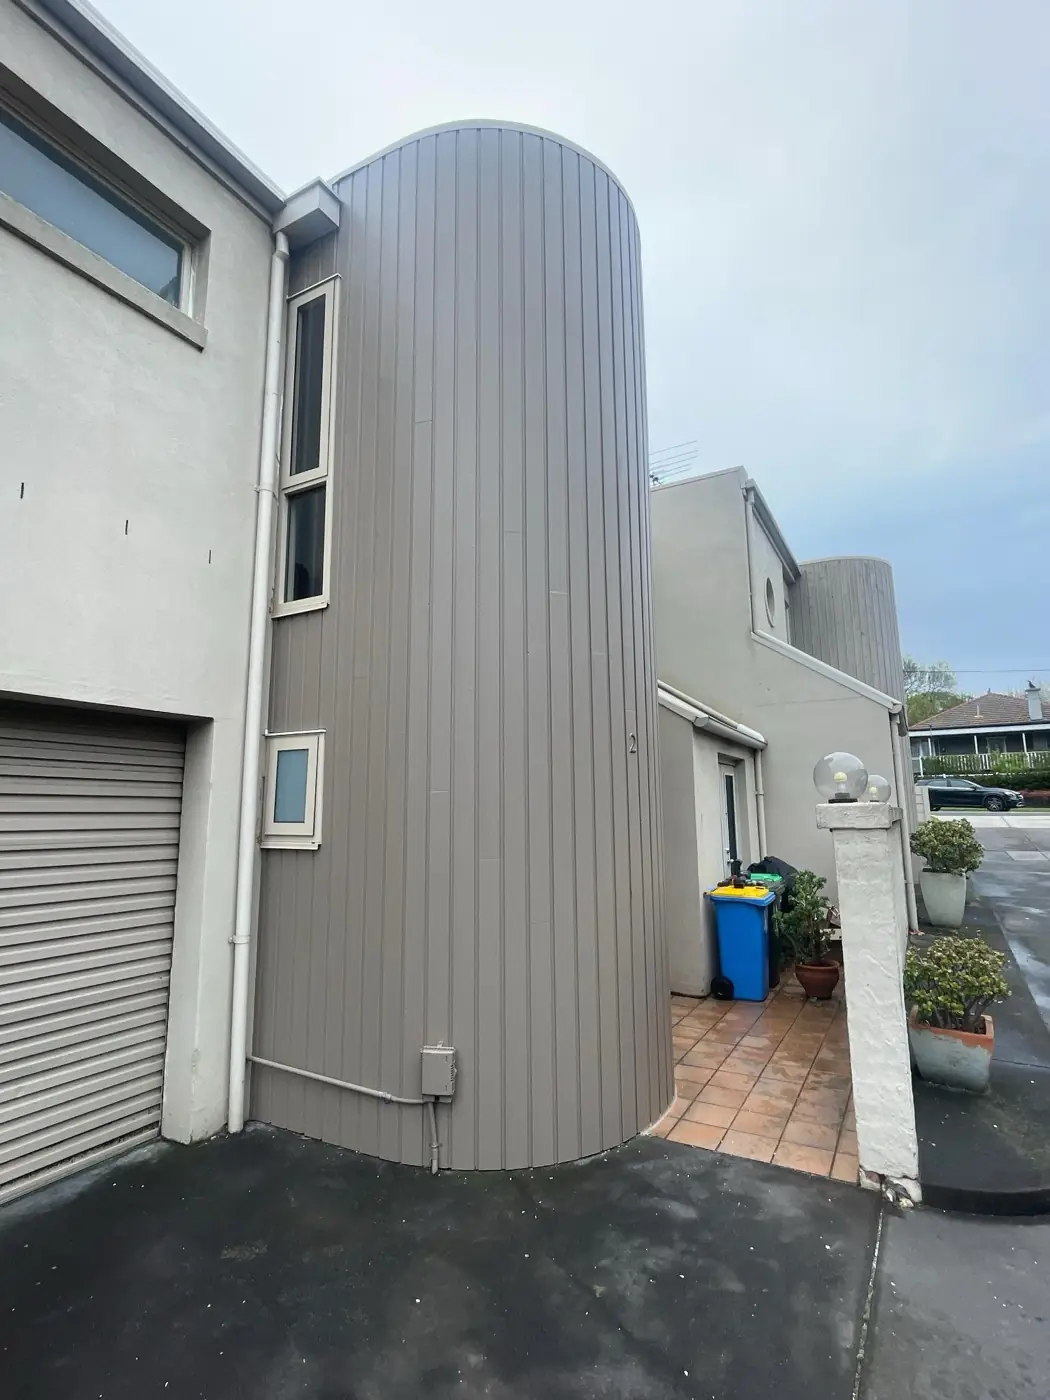
Shiplap profiles can create a more detailed architectural finish for selected façades, courtyards and feature walls. Product, fixing method and finish should be selected to suit the wall and exposure.

Composite cladding

MCS can also install suitable composite cladding systems where the selected product and wall build-up suit the project. Composite products vary significantly, so we assess the specific system rather than treating every composite board the same.

Shiplap & feature cladding projects

  • Shiplap cladding installed around an external courtyard.

    Shiplap cladding installed around an external courtyard.

  • Detailed shiplap installation around openings.

    Detailed shiplap installation around openings.

  • Curved wall membrane and preparation stage.

    Curved wall membrane and preparation stage.

  • Completed curved feature wall.

    Completed curved feature wall.

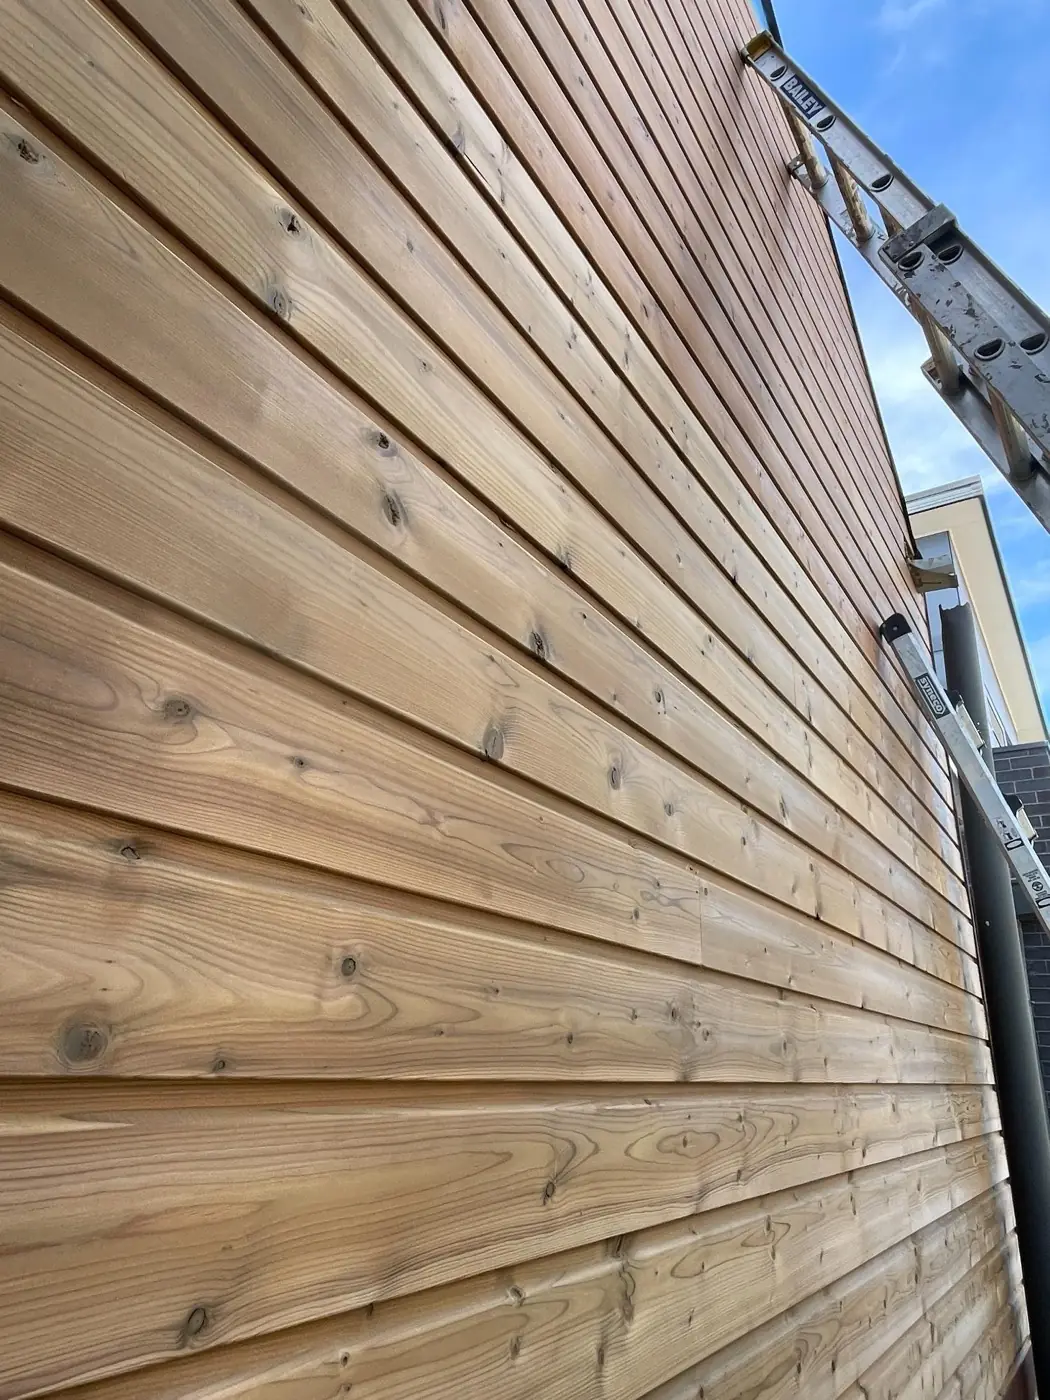
  • Timber shiplap feature cladding installation.

    Timber shiplap feature cladding installation.

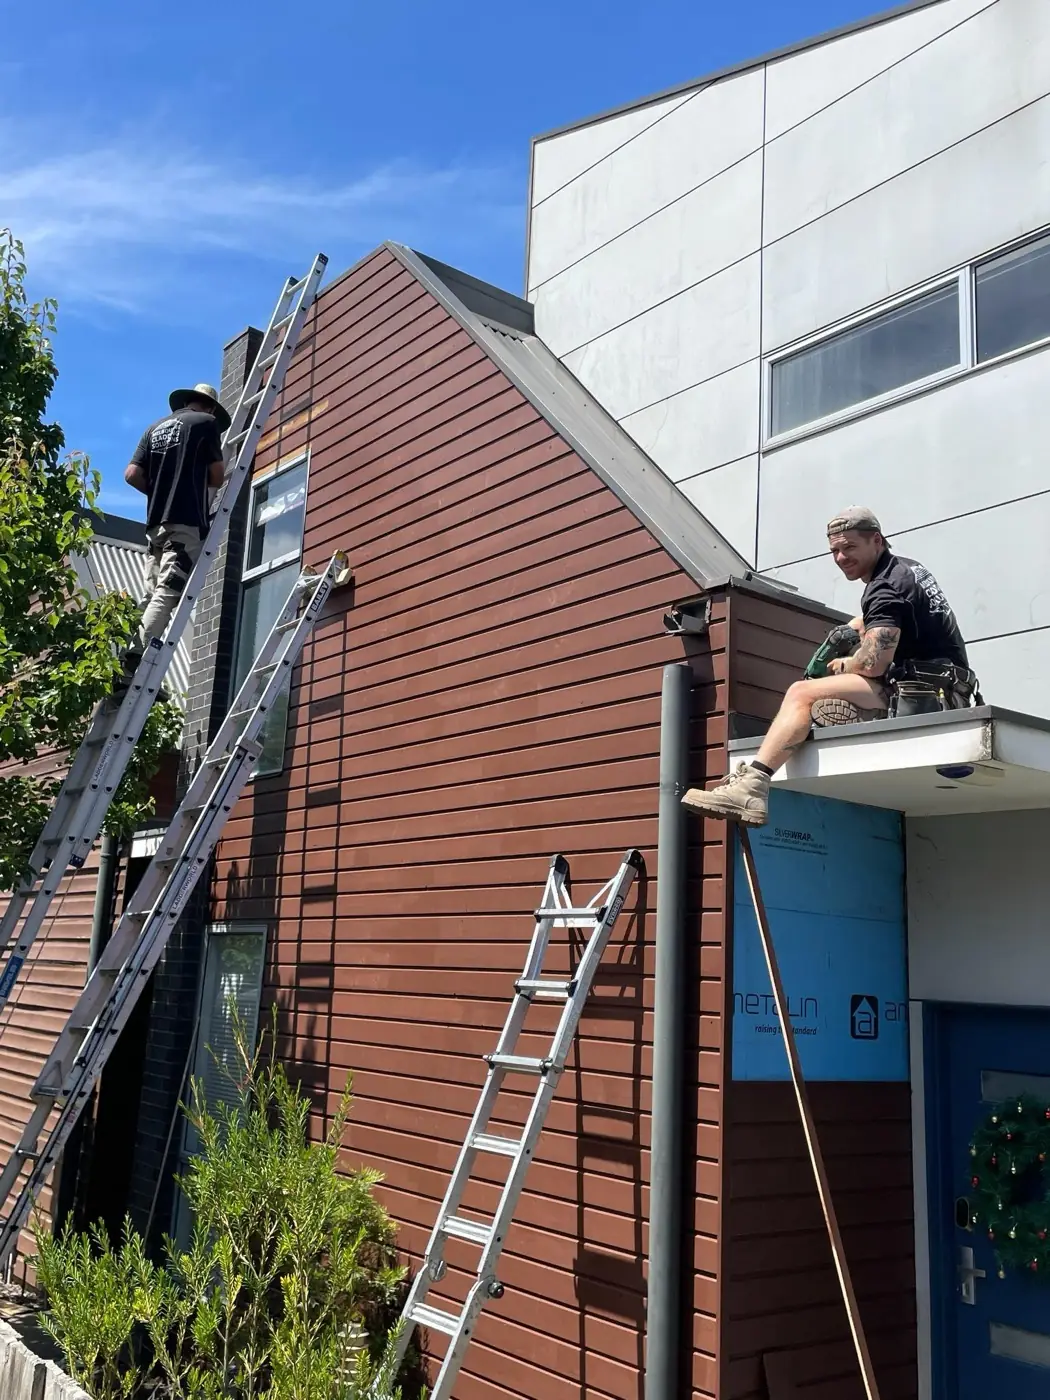
  • Feature cladding installation in progress.

    Feature cladding installation in progress.

Compare cladding options →

Choose how far you want to upgrade the wall.

Not every homeowner wants the same specification. We explain the suitable options, make our recommendation clear and tailor the agreed scope to the home, your priorities and budget.

Insulation

Retain what is suitable, or add and upgrade wall insulation where access and the project scope allow.

Wall membrane

Select an appropriate membrane system depending on the wall and desired specification.

Cavity system

Direct fix where appropriate or add a cavity-batten system where selected and compatible.

Windows & glazing

Retain, restore, retrofit double glazing where suitable, or replace windows while the surrounding wall is open.

Painting

Complete only the replacement elevations or coordinate broader exterior repainting.

Associated rectification

If opening the wall reveals deterioration outside the agreed scope, document it and explain the options before proceeding.

Required weatherproofing, safety and product-compatible installation details are never treated as optional budget deletions.

Replacing the cladding is also the ideal time to look at the windows.

When weatherboards are removed, the relationship between the wall membrane, flashing, cladding and window opening becomes accessible.

Depending on condition, your windows may be retained, restored and repainted, upgraded with retrofit double glazing where suitable, or replaced with new timber or aluminium windows.

The objective is not to replace windows unnecessarily. It is to assess them while the surrounding wall is accessible and deal with the opening as one system.

Window perimeter flashing and membrane detailing before new cladding is installed
The opening is detailed as one system with the membrane and flashing, not cut around.

How a replacement project works

01

Get an indicative estimate

Provide the main project details and we'll calculate an initial price range before committing you to a site visit.

02

Site assessment

If the range aligns with your expectations and the project is a good fit, we measure the elevations and inspect access, cladding, openings and visible conditions.

03

Confirm the specification

Choose the cladding, insulation, membrane, cavity approach, window works and paint scope relevant to your project.

04

Remove and assess

We remove the nominated cladding and document accessible concealed conditions.

05

Complete agreed wall upgrades

Any agreed frame rectification, insulation, membrane, flashing and cavity work is completed before concealment.

06

Install and finish

New or retained and reinstated weatherboards or cladding are installed with the required trims and associated finishes.

07

Handover

We complete the agreed finish, clean the work area and close out the project, including relevant concealed-work records where provided.

What if the existing cladding contains asbestos?

Some older homes have asbestos-containing exterior products.

If asbestos is known or suspected, tell us during the estimate process. Where required, MCS can coordinate the appropriate assessment and removal pathway before the agreed replacement works proceed.

Weatherboard replacement questions, answered

Yes. Weatherboard & Cladding Replacement starts from one complete wall or elevation and can extend to several elevations or the whole home.

Thinking about replacing your weatherboards?

Find out what the project is likely to involve, and the indicative budget, before arranging a site visit.

Takes a few minutes. Photos are optional, but strongly recommended if you want a more accurate indicative estimate.

Prefer to talk first?0416 408 8557am – 9pm, 7 days